
Everest Forms Cloud Storage Add-On allows you to quickly integrate Everest Forms with Cloud Storage Platforms such as Amazon S3 and OneDrive. Using the Cloud Storage Add-on, you can store, organize, and access any files uploaded via your WordPress forms. You can then relax knowing that all files are safe and secure!
Installation #
- Firstly, you need to purchase the Everest Forms Pro plugin.
- After the successful purchase, you will get the plugin zip file under your WPEverest account page.
- Now, you can download the Everest forms pro plugin and Cloud Storage add-on.
- Through your WordPress Dashboard, visit Plugins -> Add New -> Upload and then choose the downloaded zip file and then install and activate it.
- Now you are ready to use this add-on for your site.
Alternative Method:
- Once you have entered the Everest Forms Pro license on your site, go to Everest Forms > Add-ons.
- Search for the ‘Cloud Storage‘ add-on.
- Click on ‘Install‘.
- Once the installation is finished, click on ‘Activate‘. The add-on will be activated.
Setup and Configuration #
You can configure two of the following cloud storage options available.
OneDrive #
Getting Tenant and Client ID #
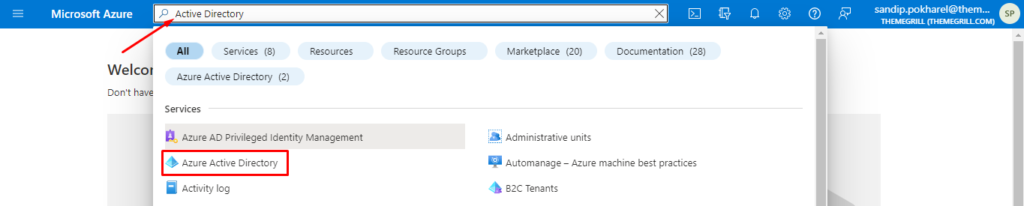
- Log in to Microsoft Azure Portal.
- Once logged in, search for ‘Active Directory‘ on the top search bar.
- Click on ‘Azure Active Directory‘.
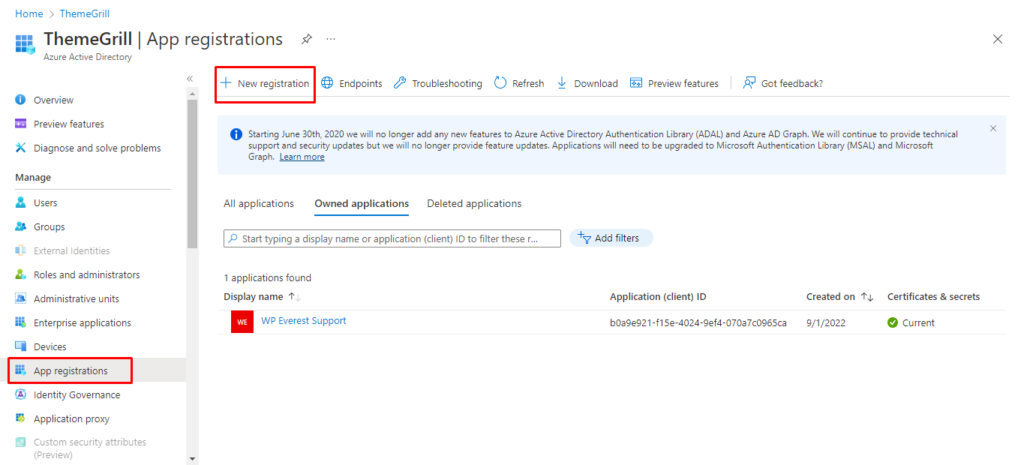
- On the sidebar, click on ‘App Registration‘.
- Click on ‘+New Registration‘.
- After this, you will be asked for the application details. Add the application name.
- On the Supported account types, select one as per your need.
- On the Redirect URI, select ‘Web‘ on the platform option.
URL Formats:
Redirect URL: https://yoursite.com/wp-admin/?evf_onedrive_auth=1
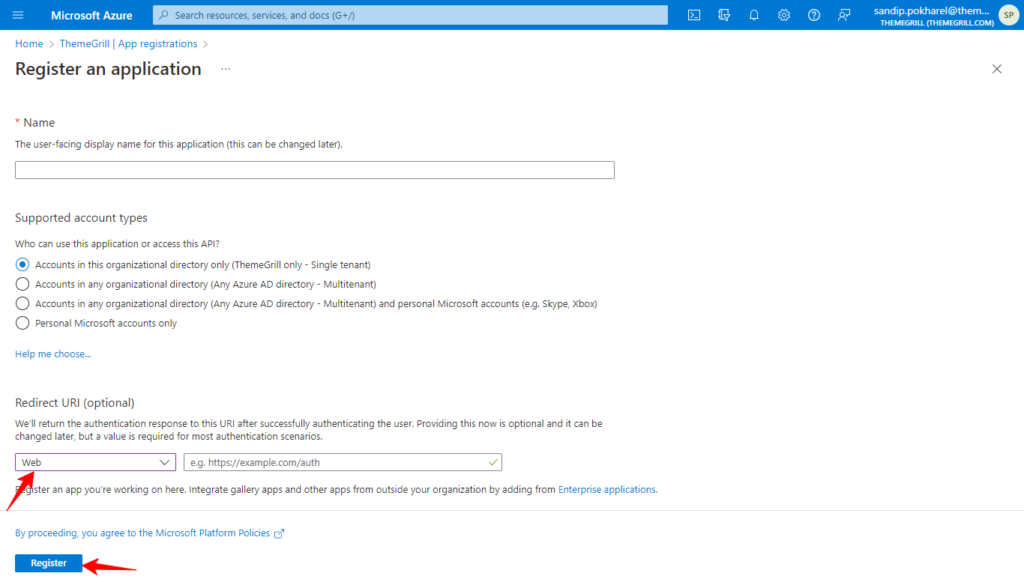
- Click on ‘Register‘.
- Now, you will be taken to the application overview page.
- On the sidebar, click on ‘API Permissions’.
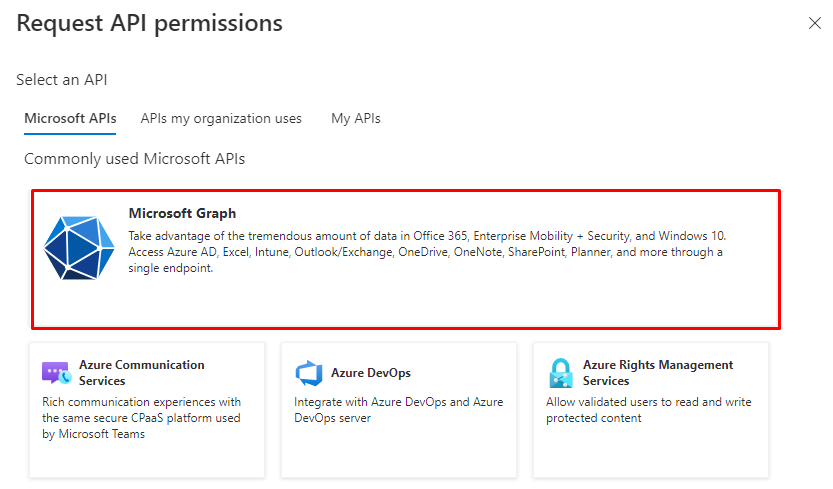
- Click on ‘Add Permission’.
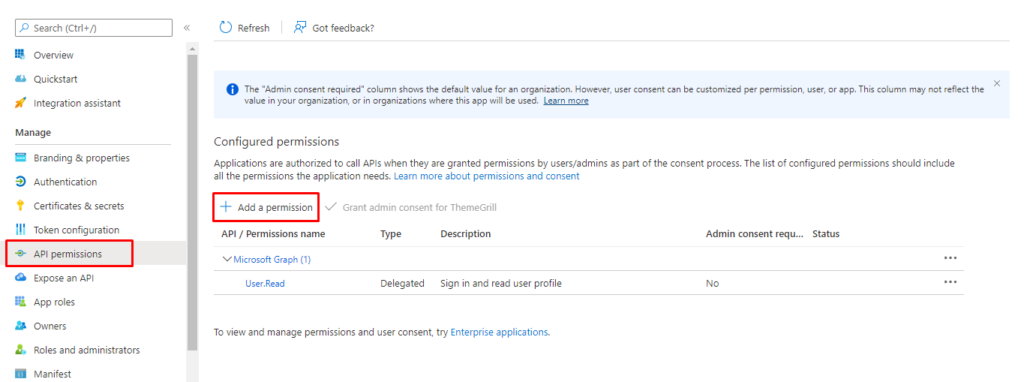
Click on ‘Microsoft Graph’.
- Click on ‘Delegated Permission’.
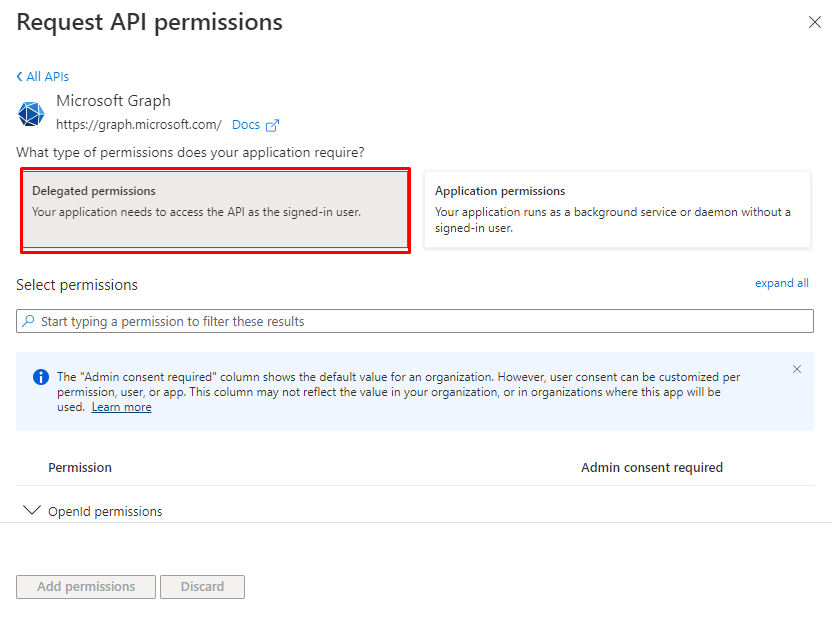
- Search and add the following permissions.
- offline_access
- Files.ReadWrite
- Click on ‘Add Permissions’.

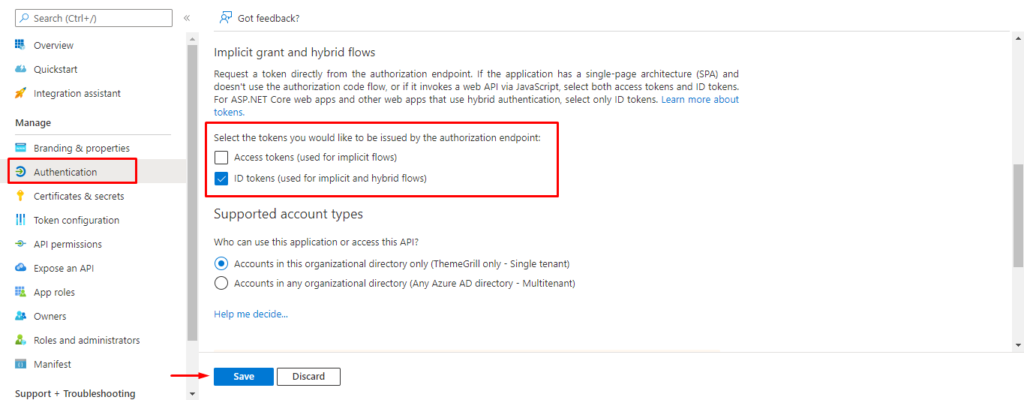
- Now, on the sidebar, click ‘Authentication‘.
- On the Token types, select ‘ID tokens‘.
- Go to ‘Overview‘ from the sidebar and copy the Application (client) ID and Directory (tenant) ID on a clipboard.
- You will also need a client secret. So, on the sidebar, click on ‘Certificate & secrets’.
- Click on ‘New client secret‘.
- Fill in the details and click on ‘Add‘.
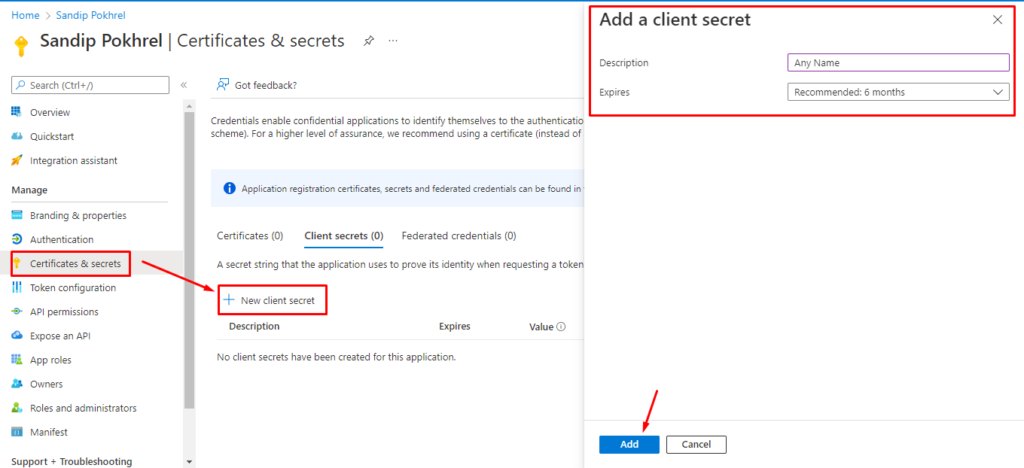
- Once the client secret is created, copy the key on the value tab to a clipboard.

Now, you are ready with all the required credentials. Keep it securely for the steps below.
Connecting Everest Forms with One Drive for sending the uploaded files #
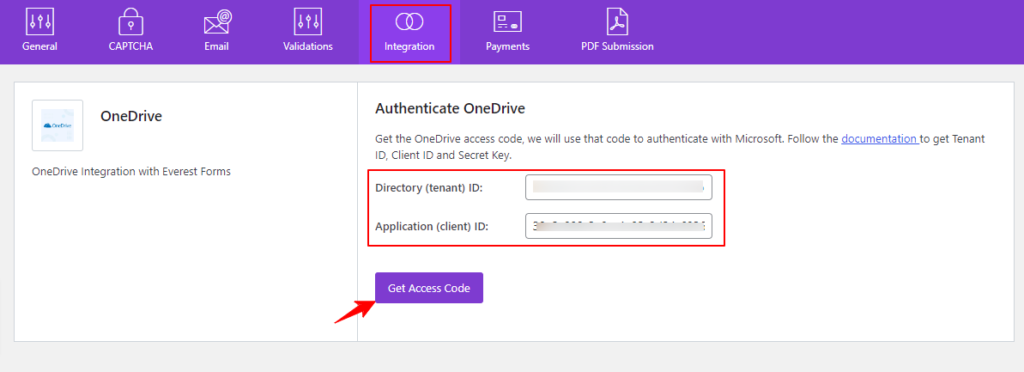
Once you have generated and copied the required credentials from the Microsoft Azure account, go to Everest Forms > Settings > Integration > One Drive. Add the Directory (tenant) ID and Application (client) ID. Click on ‘Get Access Code’.
Now, you will be presented with a new window where you will have to click on ‘Accept’. Then, you will get a token. Copy the token and add it to the ‘Access Code’ option. Also, add the ‘Client Secret Value‘ copied from the Azure account.
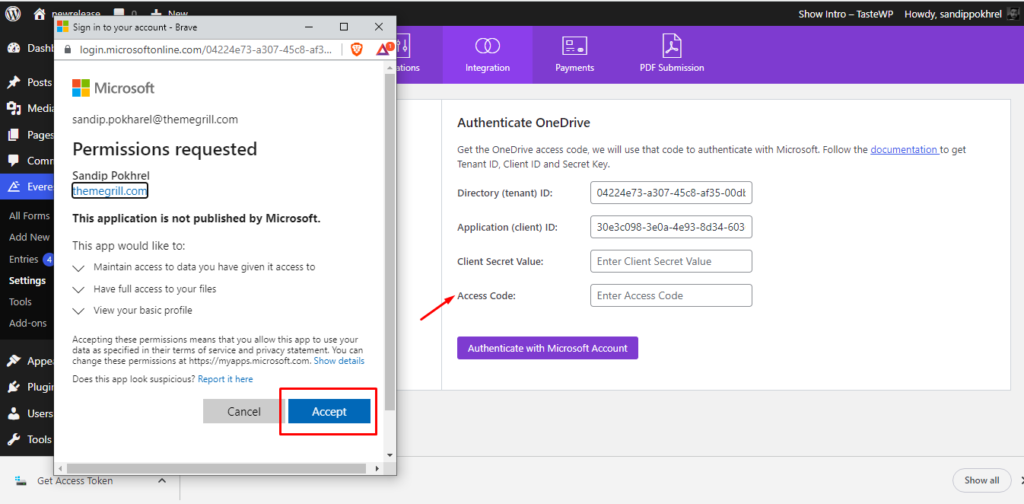
- Click on ‘Authenticate with Microsoft Account’. And you are done with the connection of the Everest Forms plugin and One Drive. Now, all that is left is to do the main job of uploading the files to OneDrive via Everest Forms.
Uploading Files to OneDrive via Everest Forms #
Create a form or edit the existing one.
Add a File Upload folder.
Go to Form Settings > General.
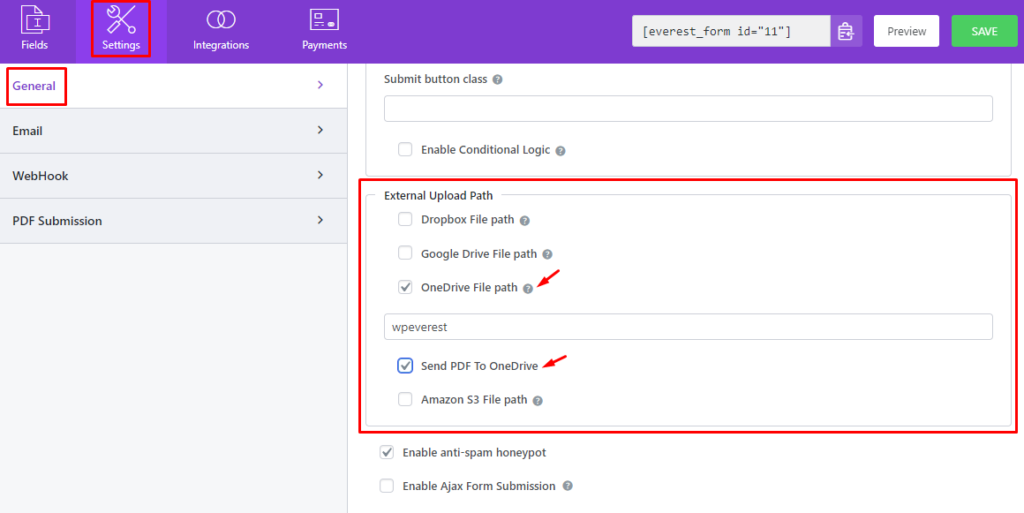
- Select the ‘OneDrive File path‘.
- Give a path.
- If you want to send the form as a PDF to the Amazon S3, select ‘Send PDF To OneDrive‘.
Note: You will have to install and activate the PDF Submission add-on for sending the PDF to OneDrive
Amazon S3 #
For connecting to the Amazon S3, you will need AWS Access Key ID & Secret Key.
Getting AWS Access Key ID and Secret Key #
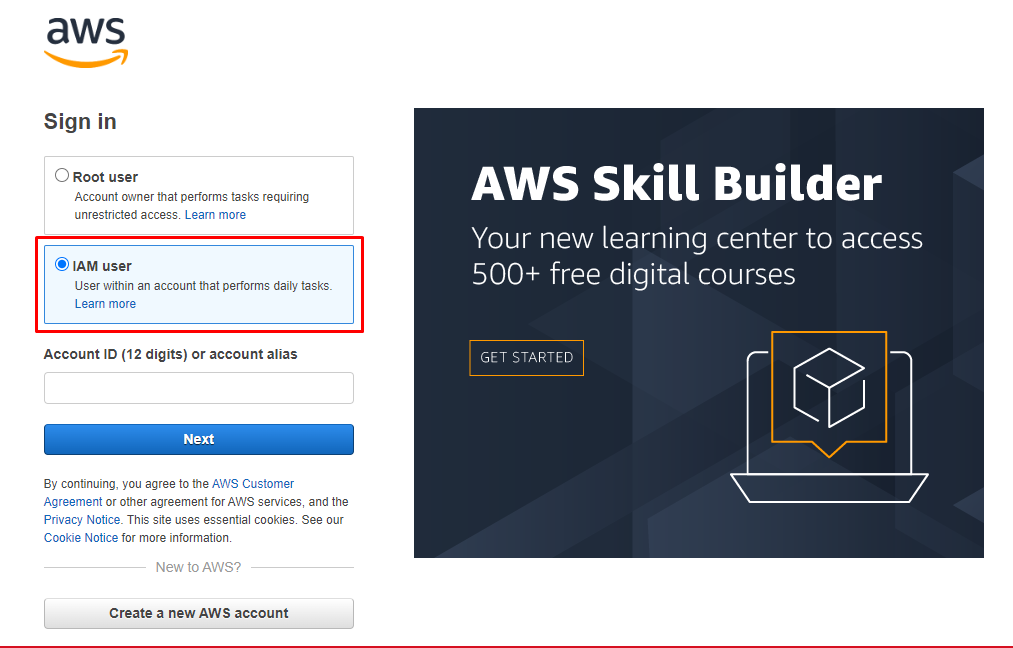
- Go to Amazon Web Services console.
- Choose ‘I am User’ and log in with the respective credentials.
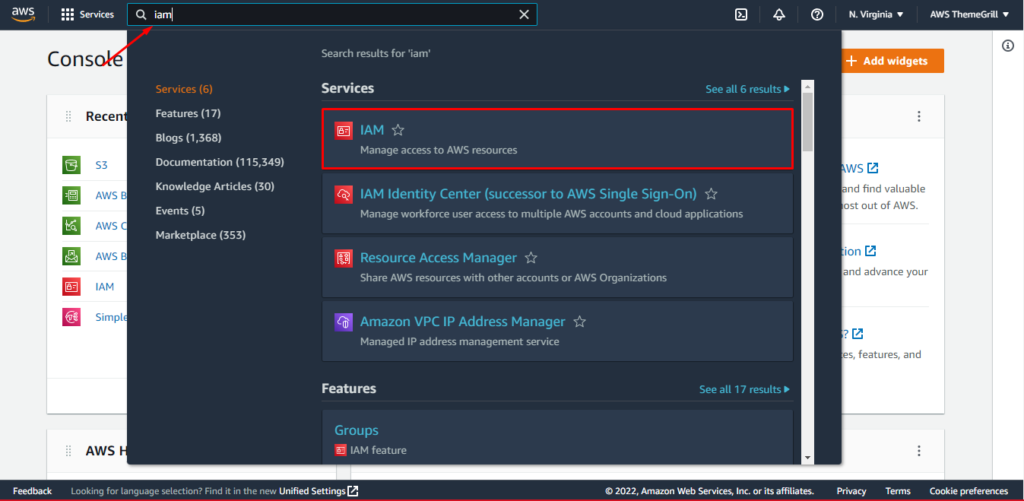
- On the search bar, type ‘Iam’ and click on the first option.
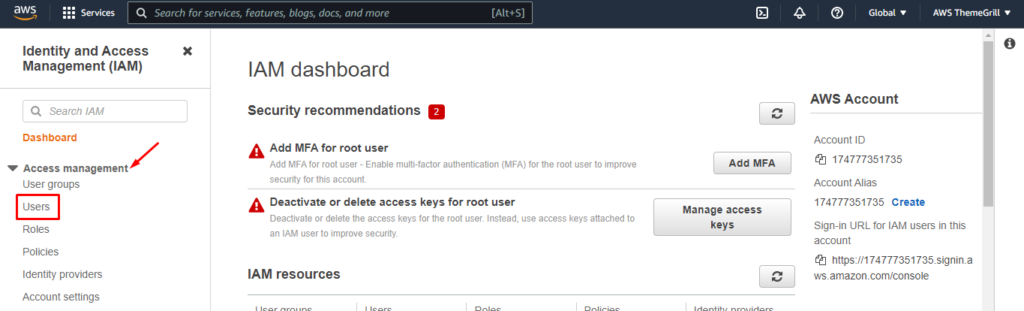
- Under Access Management, click on ‘Users‘.
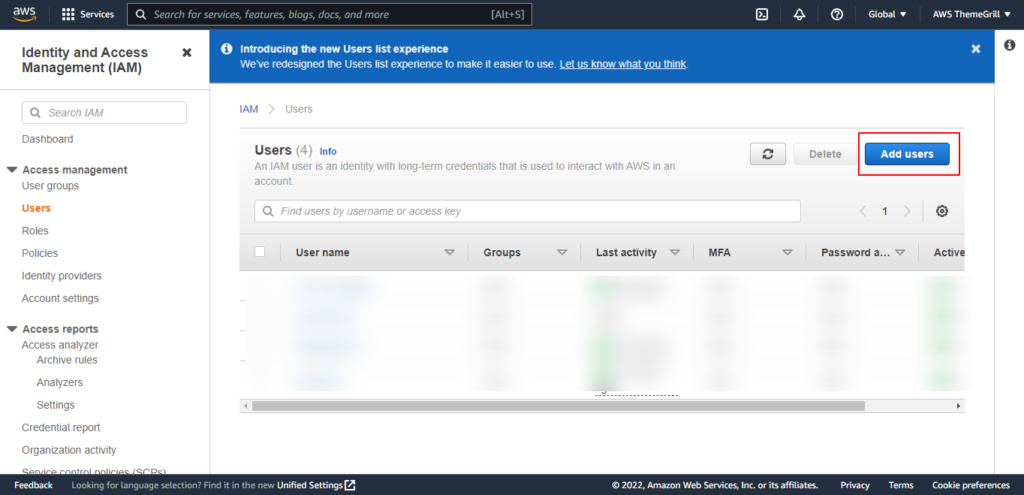
- Click on ‘Add users‘.

- Provide a username.
- On the ‘Select AWS credential type‘ option, select ‘Access Keys-Programmatic access‘.
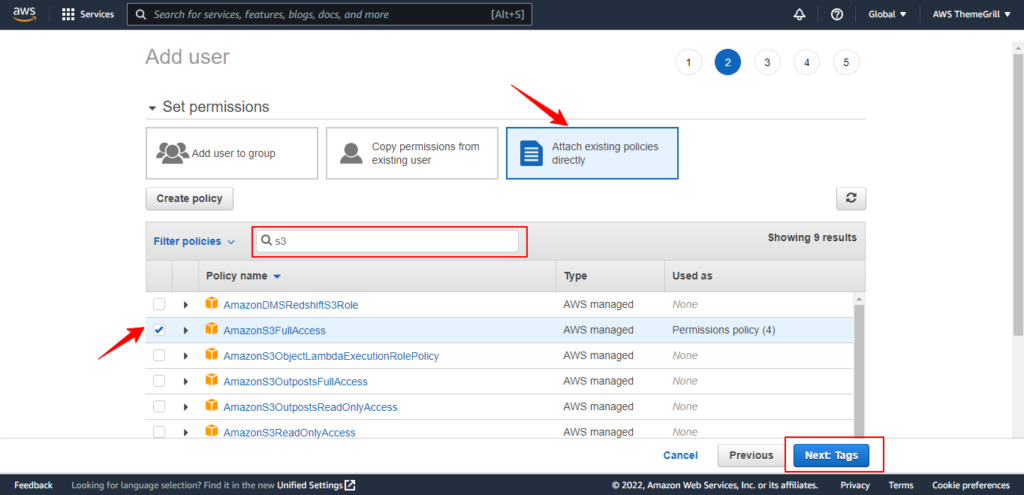
- On the ‘Set Permission’ option, select ‘Attach existing policies directly‘.
- In the search bar, type ‘s3’.
- Check mark on ‘AmazonS3FullAccess’.
- Click ‘Next: Tags’.
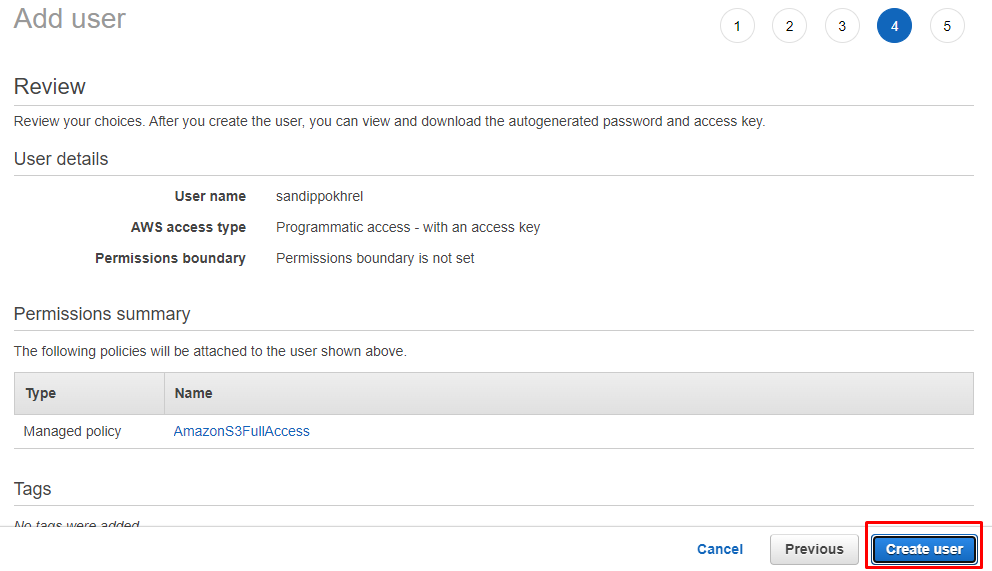
- Skip to the last step and click on ‘Create User’. You will then get the required Access keys and secret.
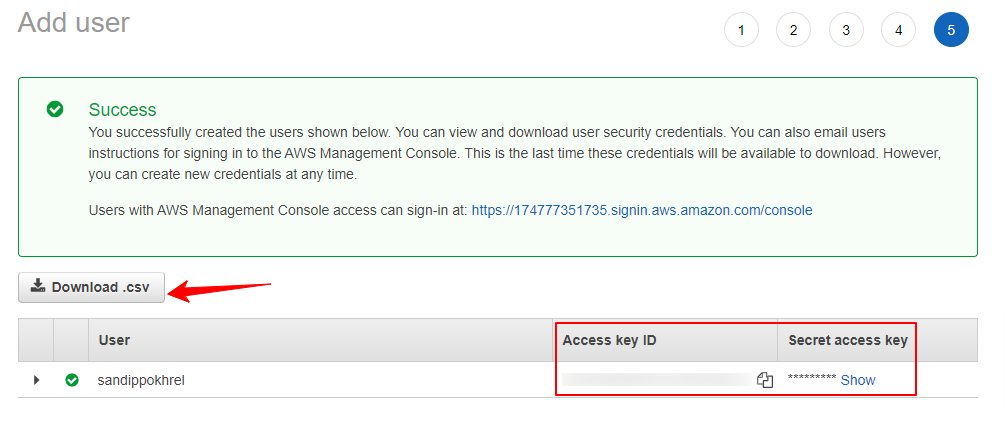
Copy these keys or download the CSV file to secure the key somewhere.
Creating Bucket #
You will now have to create a bucket to store the files coming from the Everest Forms. For this, please follow the steps below.
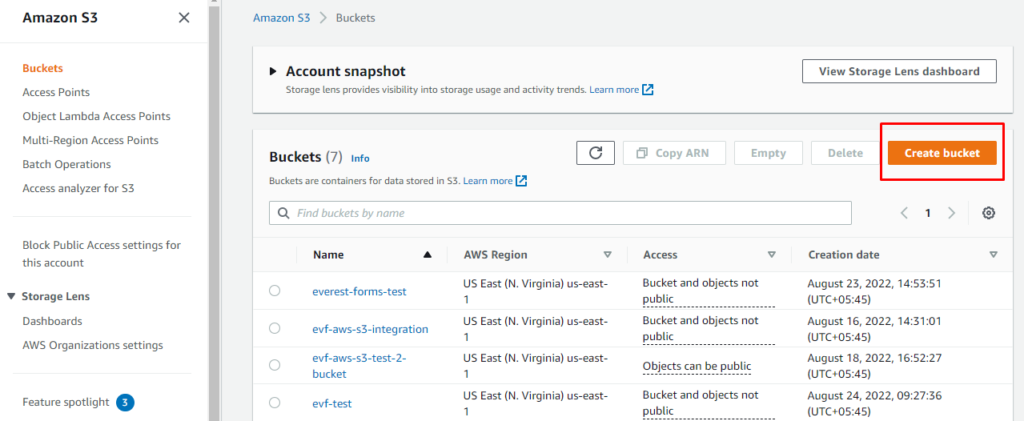
- On the search bar, type ‘S3‘ and click on the first option.

- Click on ‘Create Bucket‘.
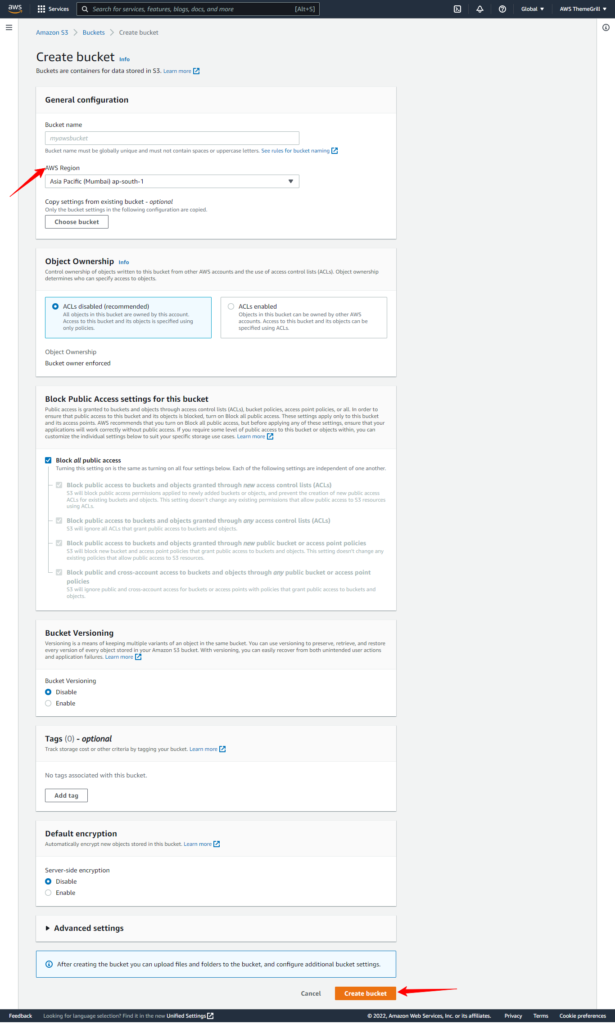
- Provide a name for the bucket.
- Select the region. You will need to use the username and region later on so don’t forget them.
- Leave everything else as they are and click on ‘Create Bucket’.
Integrating the Amazon S3 with Everest Forms #
Once you have generated the access keys and secret and also created a Bucket from your Amazon account, go to Everest Forms > Settings > Integration > Amazon S3. Add the AWS Access Key ID, Secret Key, AWS Region, and Amazon S3 Bucket Name.
Note: AWS Region, and Amazon S3 Bucket Name should match with the one you used while creating the bucket.
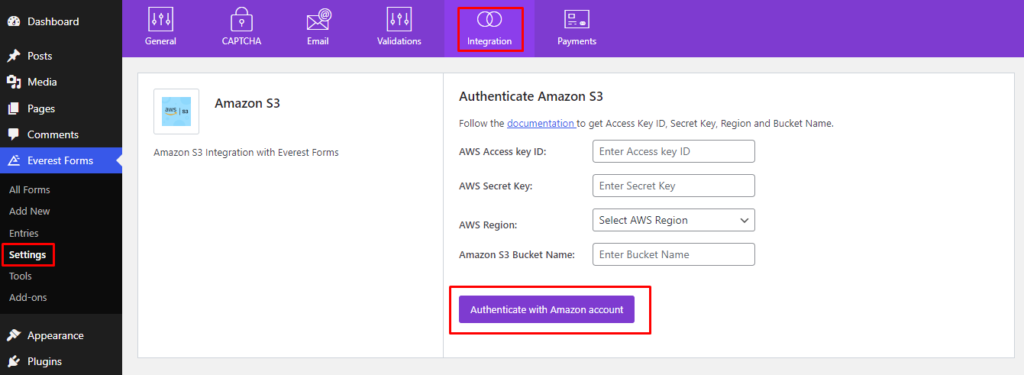
- Click on ‘Authenticate with Amazon account‘.
Uploading Files to the Amazon S3 via Everest Forms #
- Create a form or edit the existing one.
- Add a File Upload folder.
- Go to Form Settings > General.
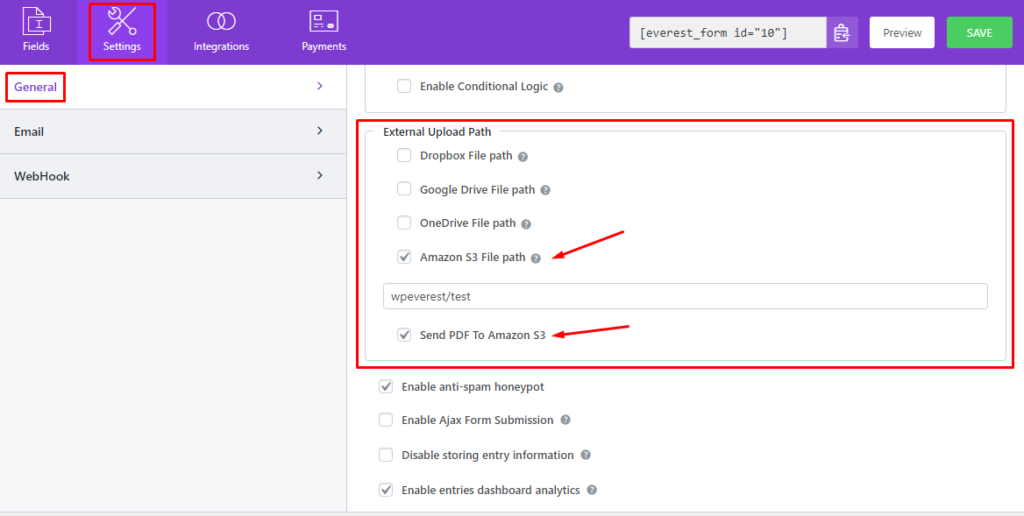
- Select ‘Amazon S3 File path‘.
- Give a path.
- If you want to send the form as a PDF to the Amazon S3, select ‘Send PDF To Amazon S3‘.
Note: You will have to install and activate the PDF Submission add-on for sending the PDF to Amazon S3.


