
A multi part form can let you break down lengthy forms into different sections, making them less overwhelming and improving user experience.
Installation #
- Firstly, you need to purchase the everest forms pro plugin.
- After the successful purchase, you will get the plugin zip file under your WPEverest account page.
- Now, you can download the everest forms pro plugin and Multi-Part add on from there.
- Through your WordPress Dashboard, visit Plugins -> Add New -> Upload and then choose the downloaded zip file and then install and activate it.
- Now you are ready to use this add-on for your site.
Setup and Configuration #
To get started, you’ll need to create a new form or edit an existing form.
Navigate to Everest Forms->Select a form->Settings->Multi-Part
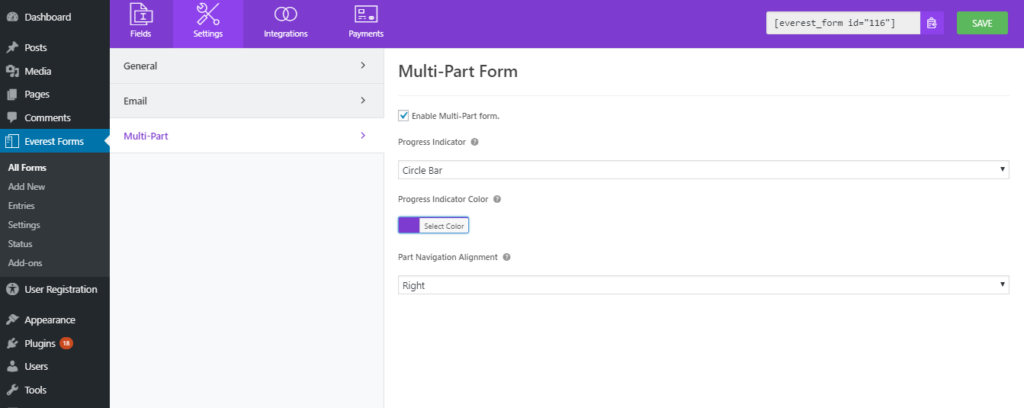
Enable Multi-Part Form: Check to enable multi-part on your form.
Progress Indicator: Select theme for Part Indicator which is displayed at the top of the form.
Progress Indicator Color: Select the primary color for the Part Indicator theme.
Part Navigation Alignment: Select the alignment for the Next/Previous part navigation buttons.
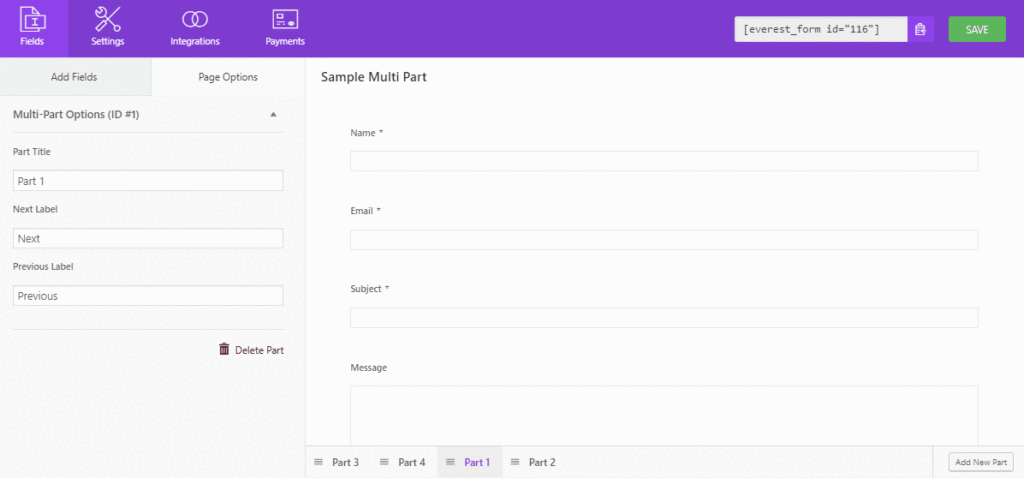
After enabling multi-part form from settings, you can now see the part and it’s options in the field.
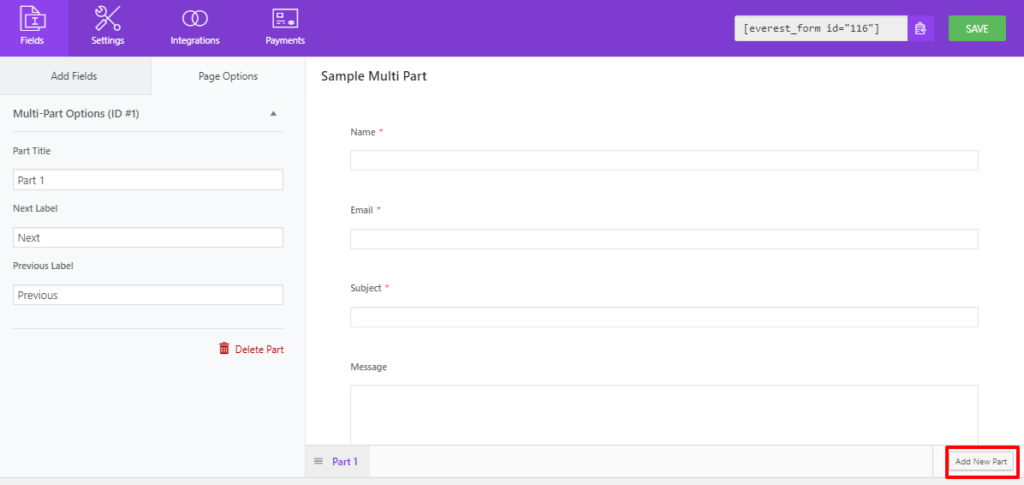
From the Page Option in the left, you can assign the Part Title, Next Label and Previous Label. And Delete the part altogether. And, You can add multiple parts by clicking on Add New Part in the bottom right. You can also Order the parts by dragging the parts.
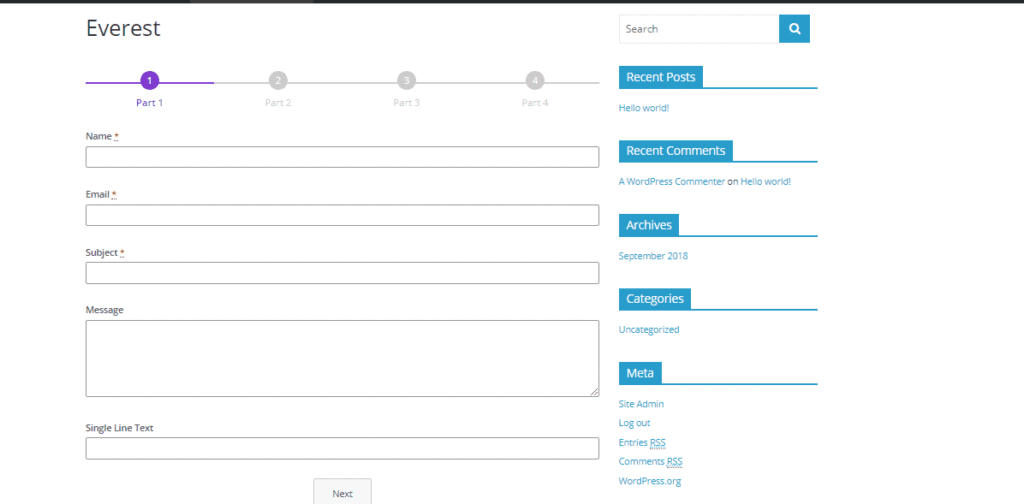
Frontend View:
Enable Preview #
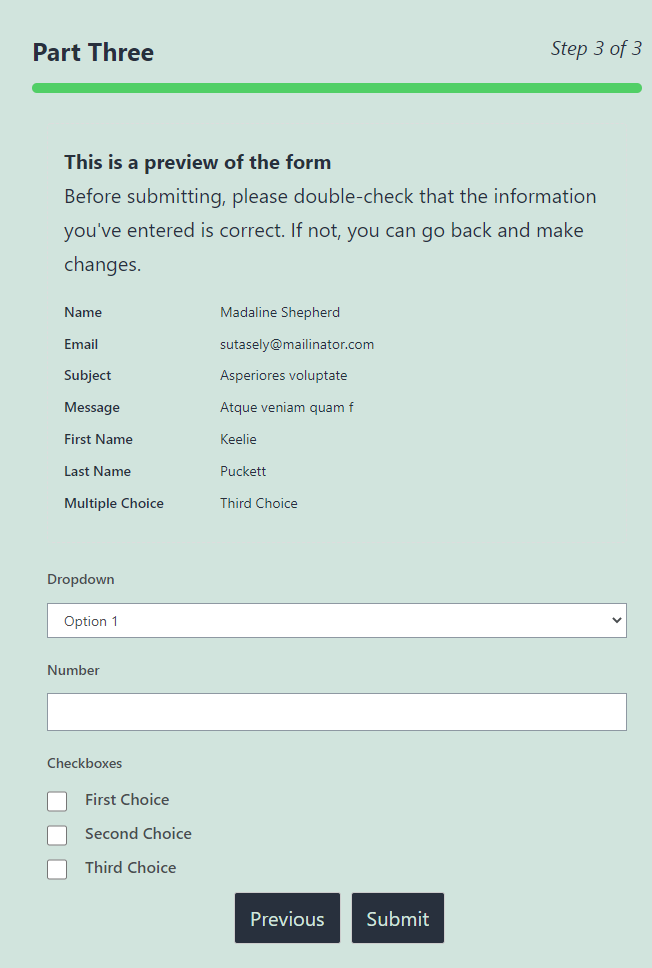
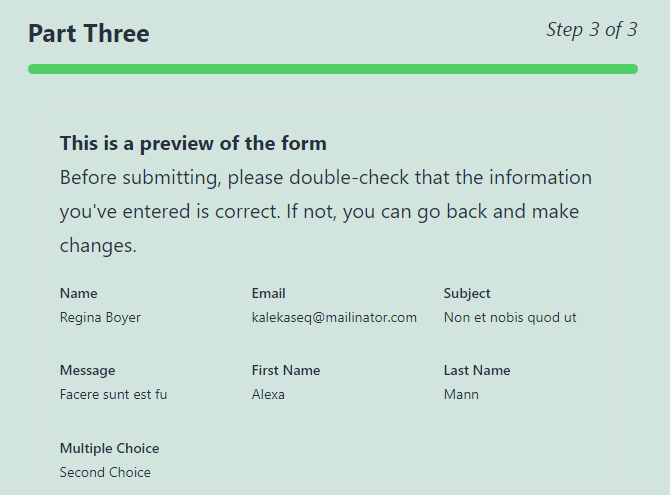
When filling the form with multiple parts, it might be confusing to remember the details that you have entered in the previous parts. Therefore, there is a feature to enable the preview of the previous part in the Everest Forms-Multipart add-on. This feature is available for all the parts except the first one since it doesn’t have any previous parts to it.
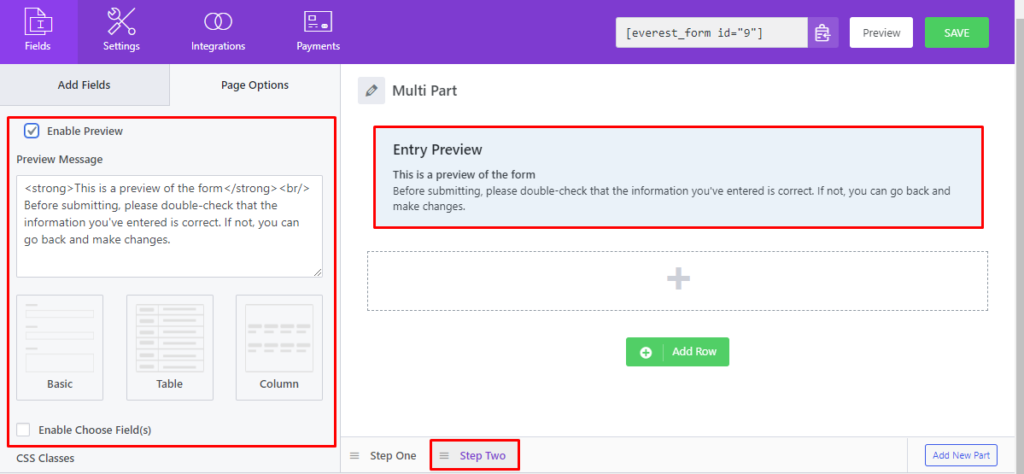
To enable this option, select the part where you would like to show the preview. On the left-hand side, you will find the ‘Page Options‘. Here, scroll down to find the ‘Enable Preview’ option. Enable this option.
- Preview Message: You can write a custom HTML message on this option that will be displayed on the part where you have enabled the preview.

Once you have set the preview message, you can now choose one of the three layouts available.
Result:
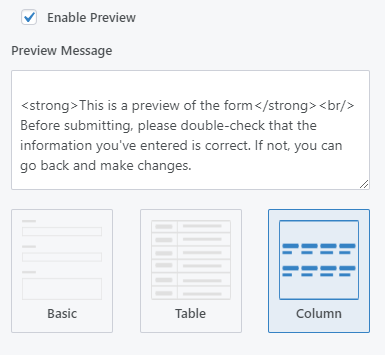
Layouts #
The three layouts that are available are:
Basic Layout #
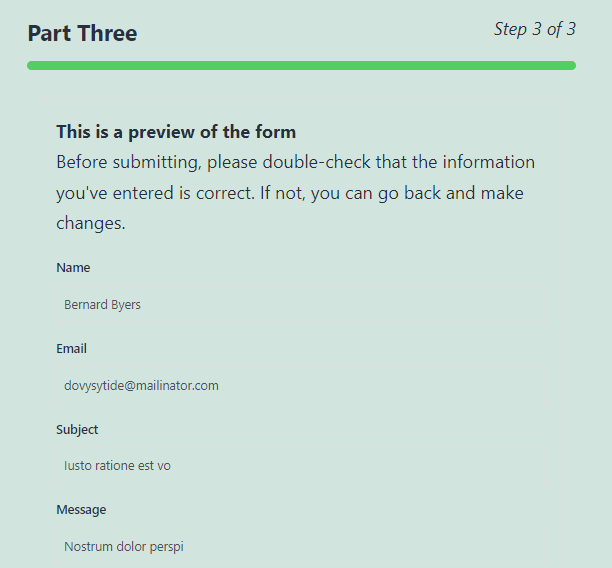
Table Layout #

Column Layout #
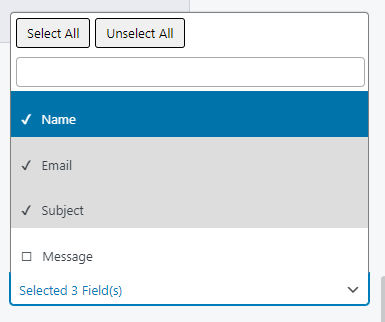
Enable Choose Fields #
You can select the desired fields from the previous parts to appear in the preview section of the current part with the help of this feature. If this option is left disabled, all the form fields prior to the current part will appear in the preview section. In the screenshot below, only three fields are selected to appear in the preview section of a part.
Enable Conditional Logic #
If you want to show/hide a particular part of the form based on the previous form fields, you can use the conditional logic feature available in the ‘Page Options‘.
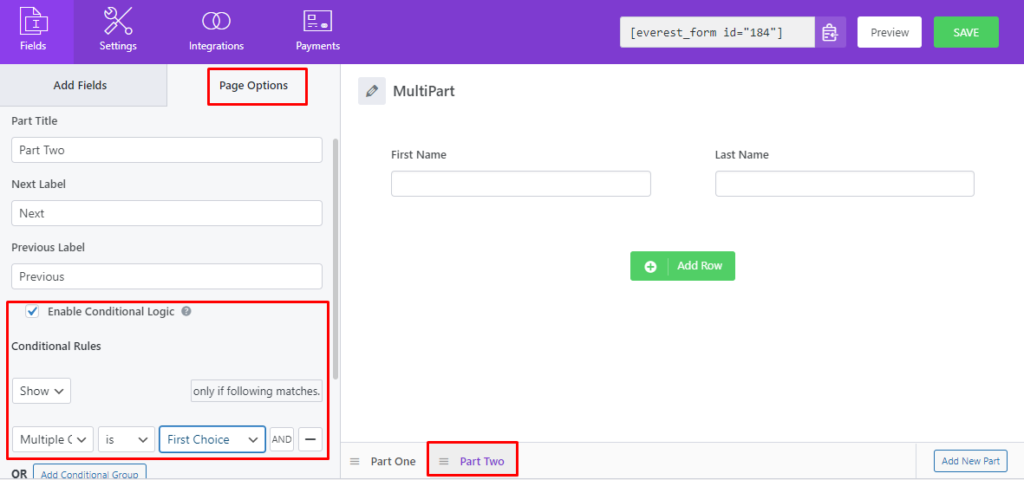
In the above example, Part Two will only be shown if the user chooses First Choice on the Multiple Choice field on Part One of the form. In this way, you can use conditional logic for making advanced forms.


