This add-on helps you integrate PayPal into your forms for registration fee payments, donations, and more. Pay without directly using your credit or debit card, with a connected email address.
What’s New? #
From Everest Forms 1.4.9, the previous Payment Field named Payment Options is deprecated. So, you can now use Conditional Logic to allow users to choose between the payment gateways like PayPal and Stripe.
Installation #
- Firstly, you need to purchase the Everest Forms Pro plugin.
- After the successful purchase, you will get the plugin zip file under your WPEverest account page.
- Now, you can download the Everest Forms pro plugin and PayPal Standard add on from there.
- Through your WordPress Dashboard, visit Plugins -> Add New -> Upload and then choose the downloaded zip file and then install and activate it.
- Now you are ready to use this add-on for your site.
Setup and Configuration #
Once, you have completed the above-mentioned task of installing and activating the plugin, now let’s move ahead on setting up this add-on for your site.
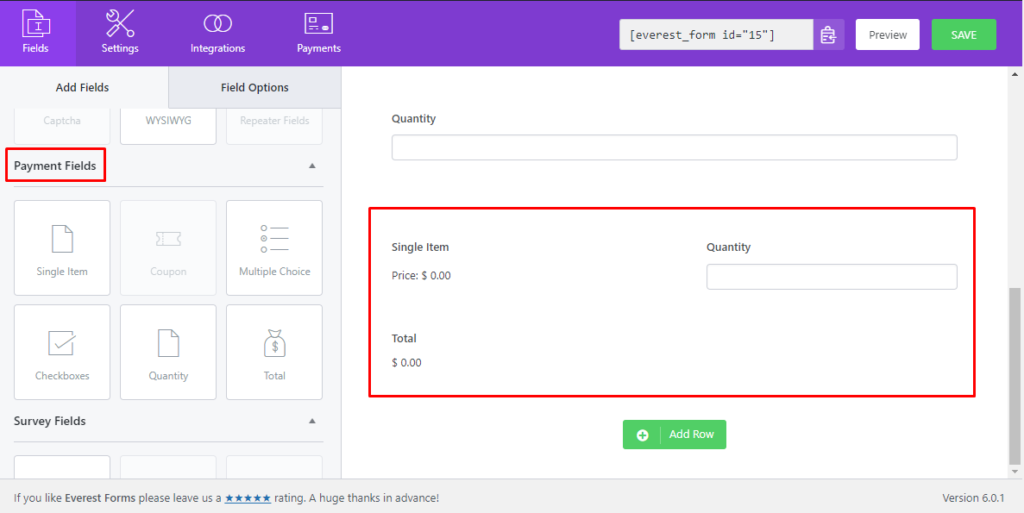
Payment Fields #
Single Item #
Firstly, you need to add the payment field in the form. Let us start dragging a single item and the total payment field.
Single item Settings:

Item Price: Set the default price to the item
The item type description:
- Pre-Defined: If set predefined, users won’t be allowed to change the item price later in the frontend.
- User Defined: If set user-defined, users can change the item price from the frontend ( suitable for donation type ).
- Hidden: If the single item input type is hidden, It will not be displayed on the front and the price set on the item price will be the product’s price.
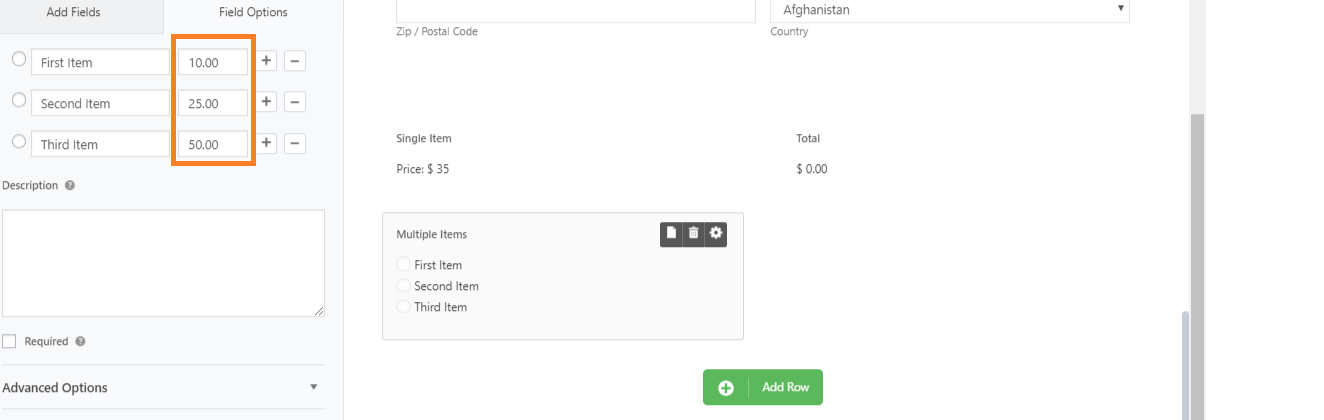
Multiple Choice: #
With the multiple items fields, you can provide options for the user to select the option. You can set each item’s price as shown in the figure below.
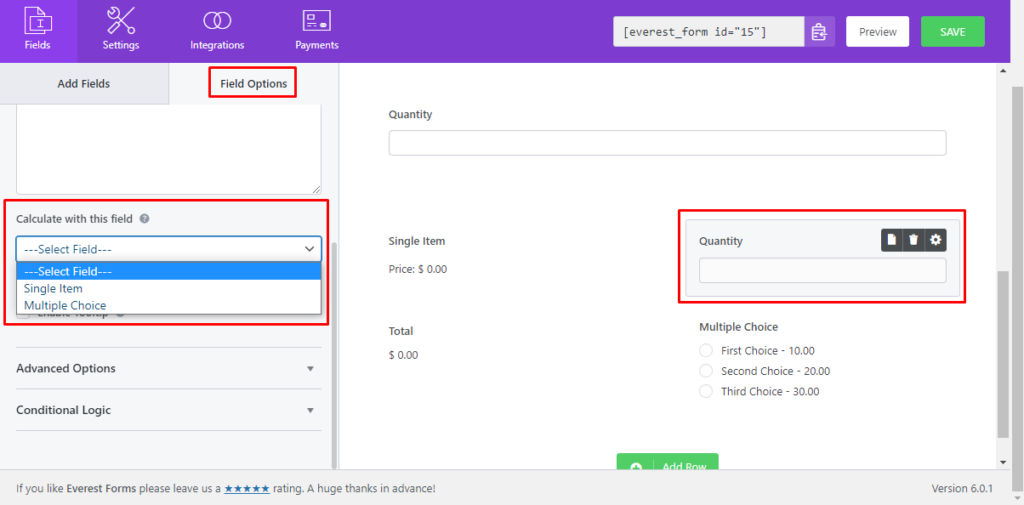
Quantity #
This field can be assigned to a single item or multiple-choice field and it maps the quantity entered by the users.
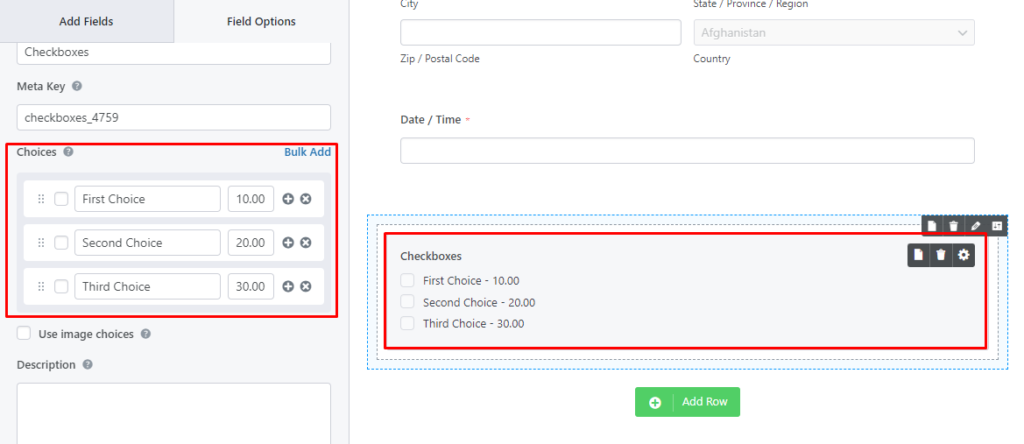
Checkbox #
With the checkbox field, you can allow the users to select two or more options. The item’s price can be set as below.
Total: #
The total field helps you to display the total of all payment field’s prices.
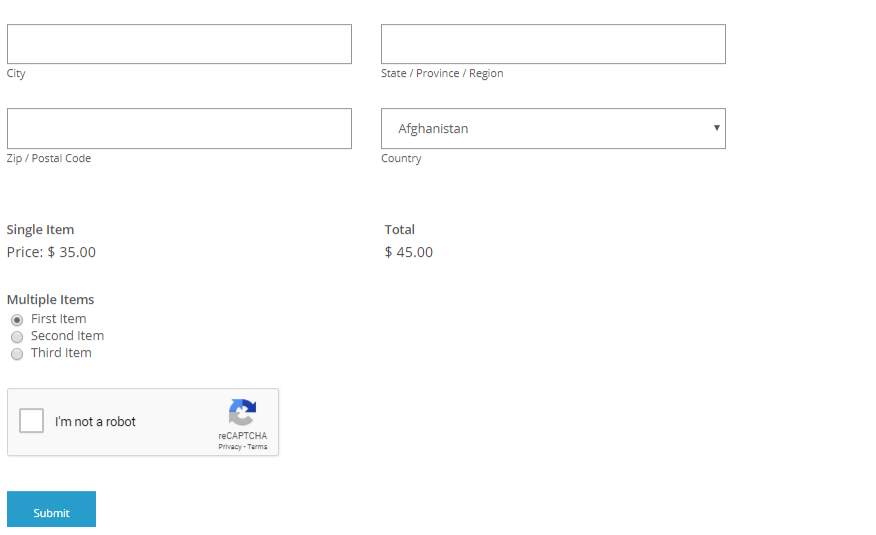
Frontend View:
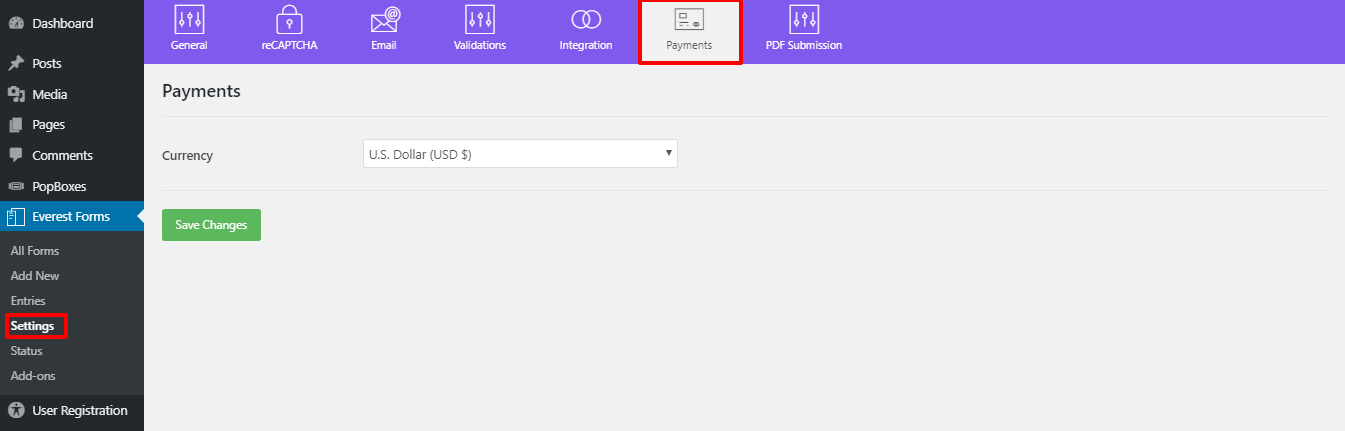
You can set up the currency from the global settings. Navigate to Everest Forms->Settings->Payments.
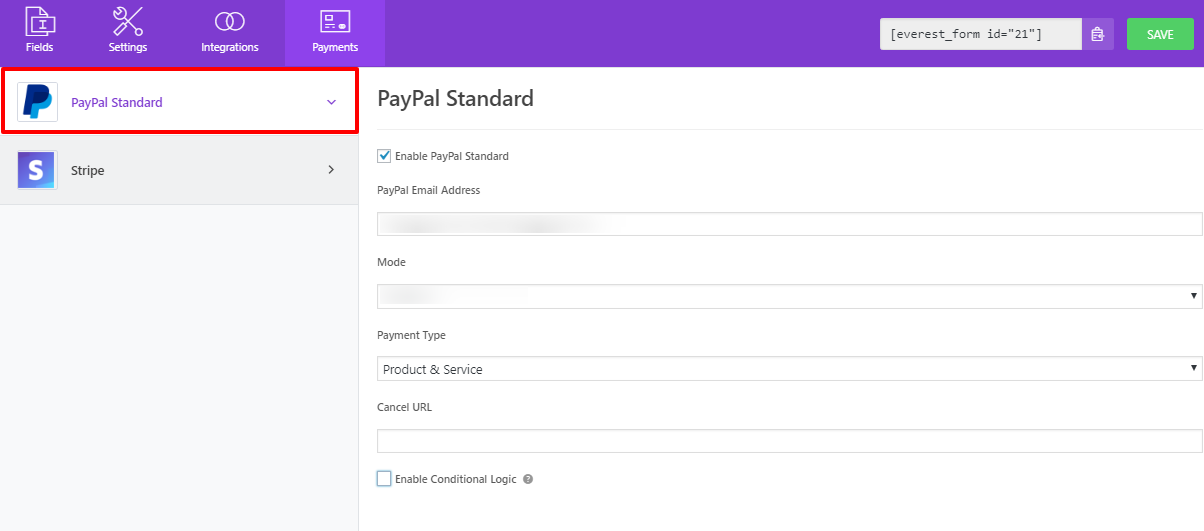
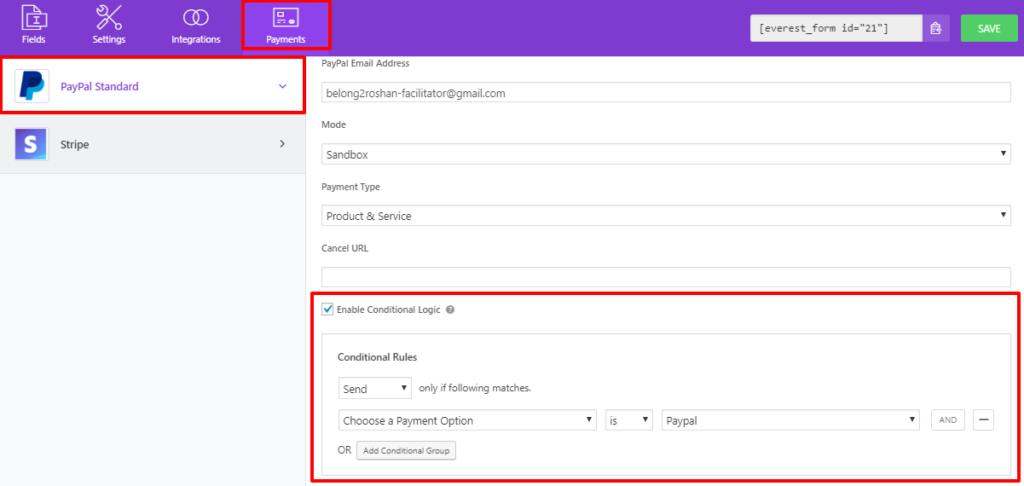
PayPal Standard Settings: #
Enable PayPal Payment: To enable or disable the PayPal Payment Option.
PayPal Email Address: The email address of the payment receiver.
Mode: Sandbox or production mode. Sandbox mode for testing purpose.
Payment Type: Products and Services or donation. The type of payment.
Cancel URL: Redirect url if the user cancels after redirecting to PayPal.
Enable Conditional Logic: If you also use the Conditional Logic add on, you can use it to provide payment option between PayPal and Stripe add-on.
How to add PayPal as a payment method with Stripe? #
If you have both the Paypal standard and the Stripe addons, you can create options for your customers to choose between the two payment methods.
Firstly, insert a Multiple Choice field and add PayPal and Stripe as payment options.
Compatibility with Conditional Logic: #
Everest Forms Pro allows you to enable conditional logic using the Conditional Logic addon on. You can not only integrate conditional logic on each and every form field but also, on both the payment options. This lets you set up a more responsive and situationally adaptive payment for your users.
If you are new to Conditional Logic and want to learn what it is in detail Click Here.
Use Conditional logic for PayPal: #
Go to the Payments tab at the top. And make sure you enable both Paypal and Stripe. Then, Click on PayPal and Enable Conditional Logic. Now, make the settings so that Stripe is implemented only if the user selects the PayPal option in the form.
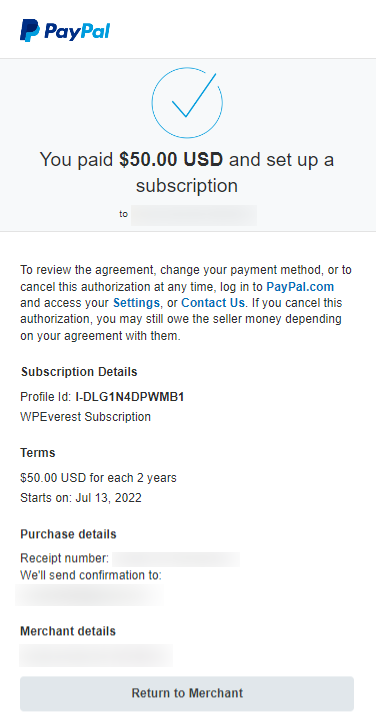
PayPal Subscription for Recurring Payments #
Everest Forms PayPal Standard also supports Recurring Payments. To charge users on a periodic basis, you can enable recurring payments on the registration form, and then the users will be charged periodically. To do so, in the form builder, click on Payments > PayPal Standard and then tick both options, Enable PayPal Payments, and Enable Recurring Subscription on PayPal.
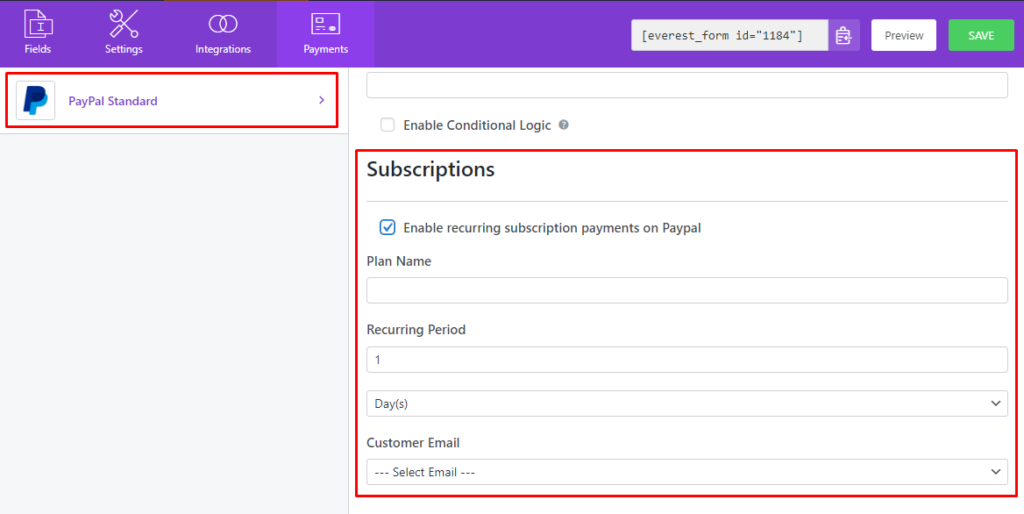
In the Plan Name, you can give a name to your recurring plan.
In the Recurring Period option, you can select the frequency when the next transaction will be done. Also, you can select intervals between the recurring payment i.e 15 days, 5 weeks, 6 months, and so on.
In the Customer Email option, you can select the Email field that your user will fill in during the form submission.