
- An Easy Guide to Form Entries
- How to View the Form Entries?
- Heartbeat notifications
- How to Filter Form Entries by Form?
- How to Search for Form Entries?
- How to Export Form Entries?
- How to Delete Form Entries?
- How to Hide Empty Fields?
- How to Disable Form Entries?
- How to Restore Trashed Form Entries?
- How to Star Form Entries? (Pro Feature)
- How to Make the Form Entries Unread? (Pro Feature)
- How to Resend Notification for Individual Form Entries? (Pro Feature)
- How to Print Individual Form Entry? (Pro Feature)
- How To Edit Form Entries? (Pro Feature)
- How to show/hide the column items on the Entry page?
An Easy Guide to Form Entries #
Are you confused about how to manage your form entries in WordPress?
With Everest Forms, you can easily access and handle your form entries right from your dashboard. First, you need to create a form and add the form to your site.
After that, follow the instructions below to learn:
-
- How to View the Form Entries?
- How to Filter Form Entries by Form?
- How to Search for Form Entries?
- How to Export Form Entries?
- How to Delete Form Entries?
- How to Hide Empty Fields?
- How to Disable Form Entries?
- How to Restore Trashed Form Entries?
- How to Star Form Entries? (Pro Feature)
- How to Make the Form Entries Unread? (Pro Feature)
- How to Resend Notification for Individual Form Entries? (Pro Feature)
- How to Print Individual Form Entries? (Pro Feature)
- How to Edit Form Entries? (Pro Feature)
- How to Sort the column items on the Entry Page?
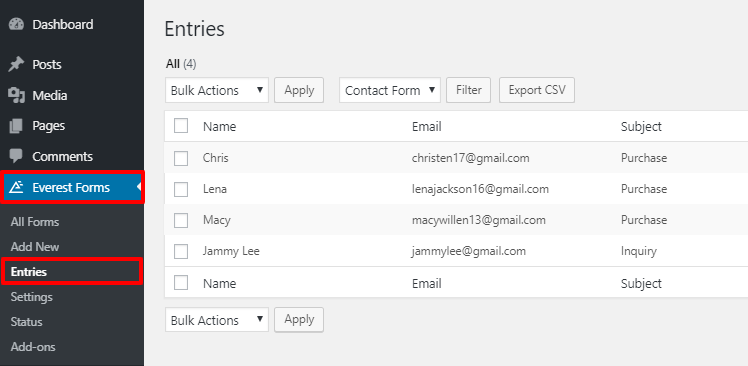
How to View the Form Entries? #
One of the best features that Everest Forms offers is the dedicated tab for form entries. To access it, go to Everest Forms and click on the Entries tab.
Here, you can see all the form entries to your form.
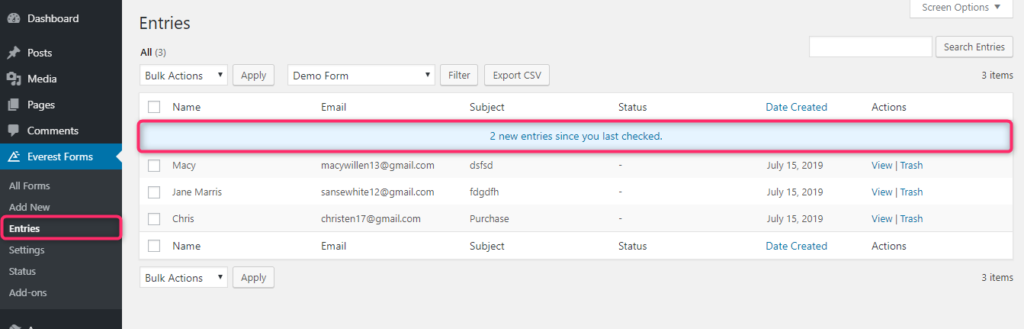
Heartbeat notifications #
In the Entries page, you can see if there are new form entries. The form submissions that are submitted after the page is loaded are notified here.
Because of this useful feature, you won’t miss any new form entries.
Another way of accessing the form entries is from individual forms.
For this, go to Everest Forms → All Forms and you’ll see all the forms that you created. Then, hover over the form you want. You’ll see many options for the individual form there.
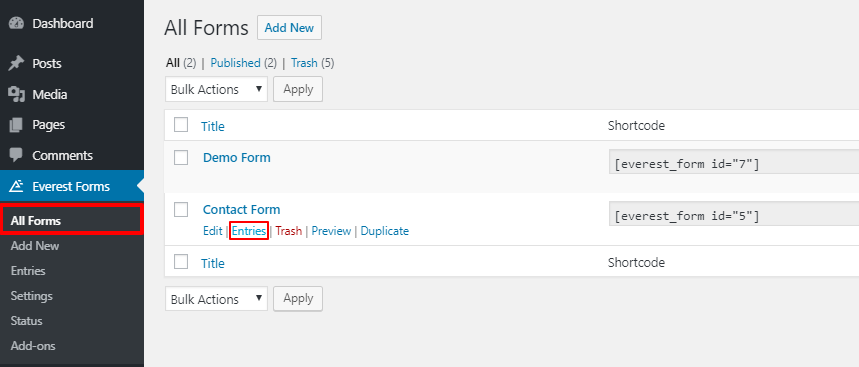
Now, click on the Entries option and you’ll see all the form entries for the form.
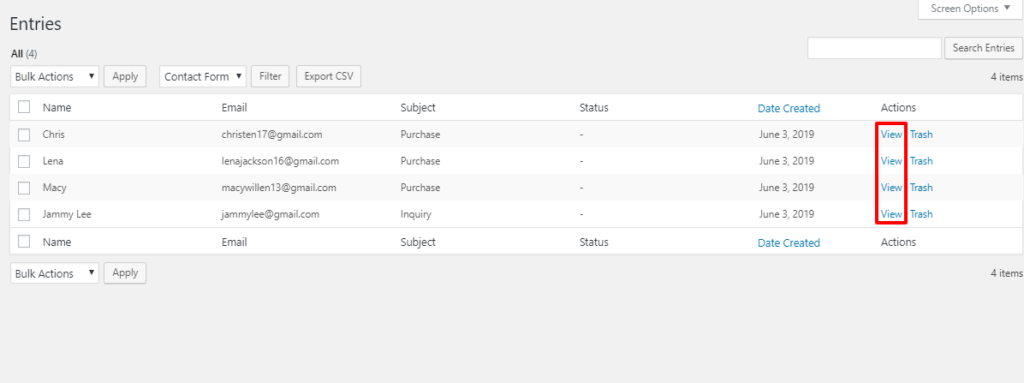
To view all the information of a single entry, Click on the View option from Actions.
How to Filter Form Entries by Form? #
After you create few forms for your site, you can filter your form entries by respective forms.
First, go to Everest Forms → Entries and on the top of the form entries, there is the Filter button.
There is a drop-down option right beside the Filter button where you can choose any form. So, choose the form that you want to see the form entries of. Then, click on Filter.

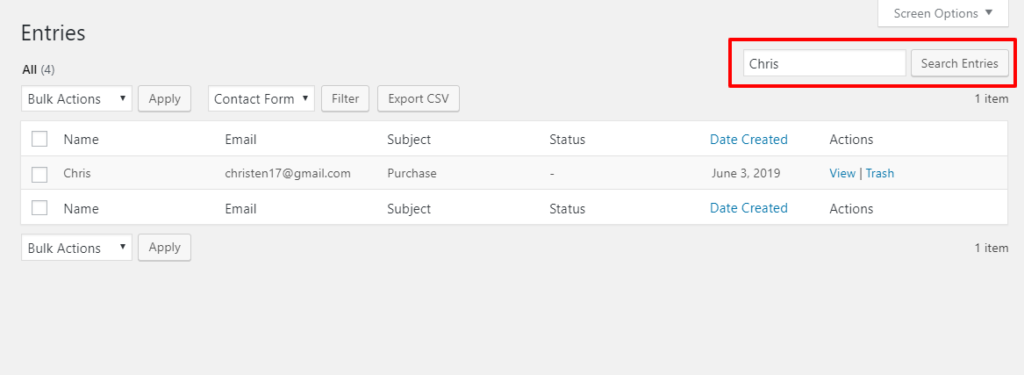
How to Search for Form Entries? #
You can even search for specific entries if you need. There is a Search bar at the top-right of the form entries. You can search for any entry by name or subject.
How to Export Form Entries? #
Next, there is the Export CSV option. You can export all the form entries to your computer. Just click on the button to export entries.
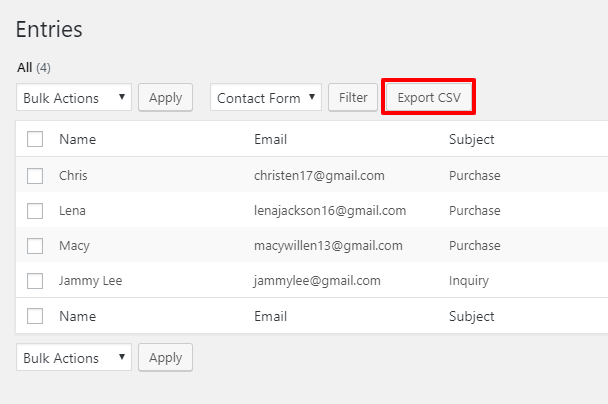
If you want a more detailed tutorial on this, check out our tutorial on How to Export Form Entries to CSV file in WordPress?
How to Delete Form Entries? #
Similarly, you can delete the entries from your site. To delete a single entry, you can simply click on the Trash option in the Actions section.
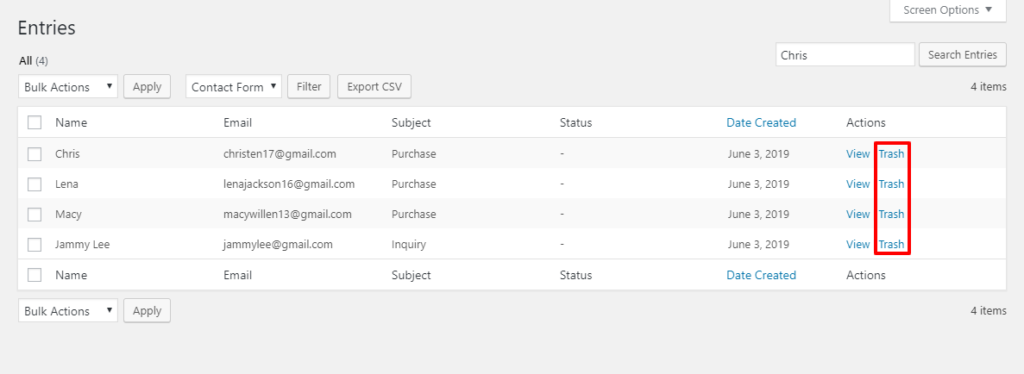
To delete selective entries, select the entries and select Trash in the Bulk action option and click on Apply. Then, your selected entries will be deleted.
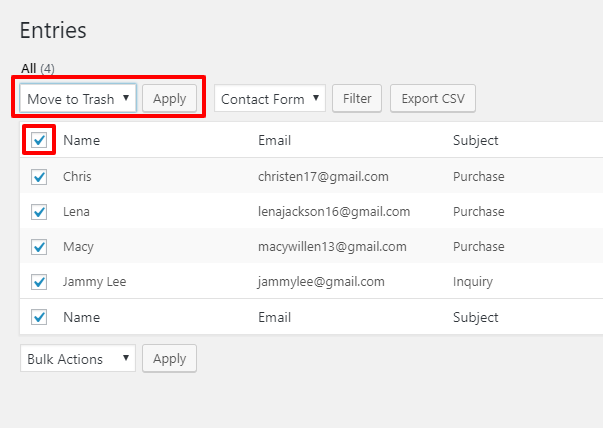
Now, you can also delete all the form entries in one go. For this, select the Checkbox next to Name. This automatically selects all the form entries. After that, select Trash from the bulk action option and click on Apply.
How to Hide Empty Fields? #
Also, there is the option to hide empty fields in a form entry. If you click on any entry, you can see the Hide Empty Field option in the top right corner of the entry.
You can use this feature to hide the fields that are left empty.
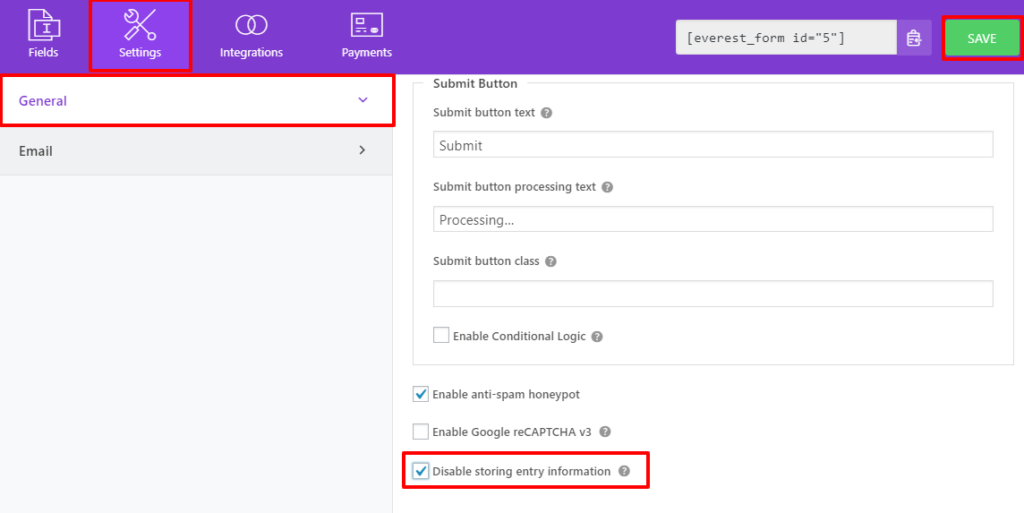
How to Disable Form Entries? #
Furthermore, you can disable form entries from individual forms whenever you like. Go to the form builder and click on Settings.
On the General settings, if you scroll down a bit, you’ll see the checkbox option to disable storing entry information. Click on that to disable form entries to your form.
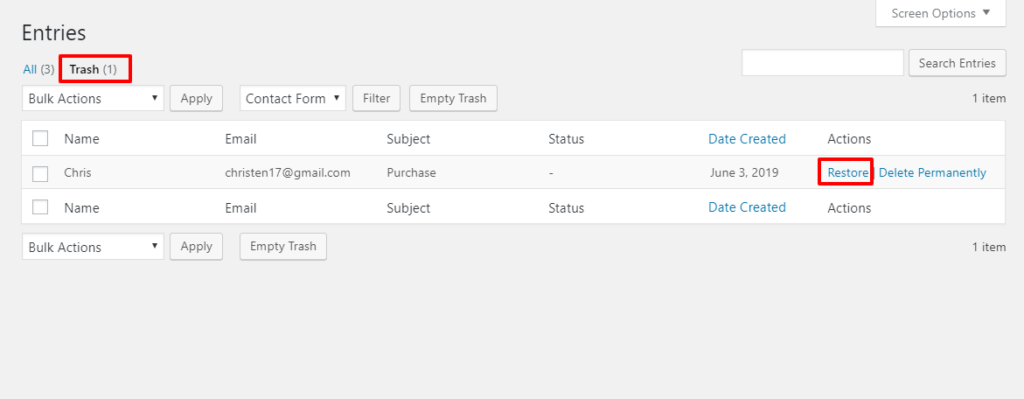
How to Restore Trashed Form Entries? #
If you accidentally delete entries then, don’t panic. You can retrieve these entries from the trash.
Go to Entries and you’ll find a Trash section on the top of the entries page. After you click on it, you’ll see the deleted entries there.
So, you can either Restore it or Delete Permanently.
How to Star Form Entries? (Pro Feature) #
Now, you can add the form entries to starred so, you can keep track of the important form entries. Go to Everest Forms → Entries. Then, select the Form you want to view the entries.
Here, you can see the star option for each form entry.
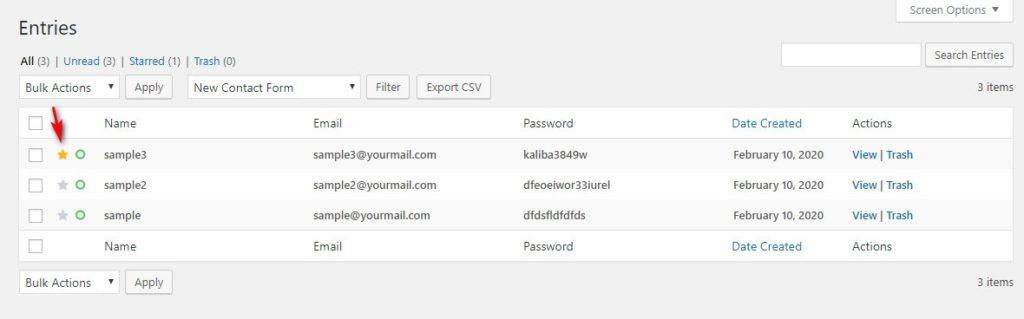
After you add the form entries in Starred, you can easily view only the Starred form entries. For this, click on the Starred tab on the top left of the Entries page.

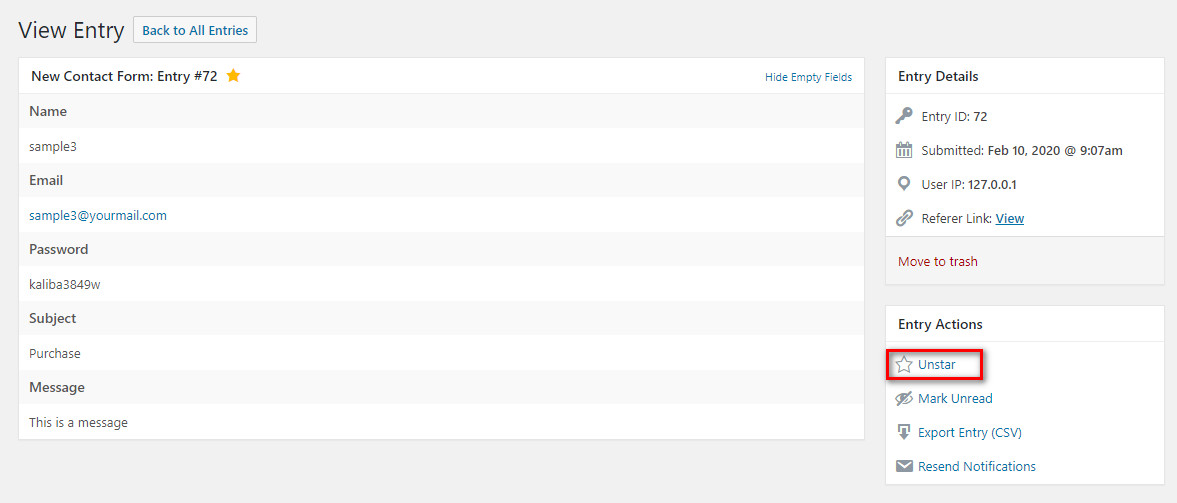
Also, when you view the individual entries, you have the option to Unstar the form entry whenever you like.
How to Make the Form Entries Unread? (Pro Feature) #
The Pro version of the plugin will allow you to make the form entries Unread. For this simply click on the small Green circle on each form entry. And just like the Starred option, you can view the Unread form entries in one place through the Unread tab.

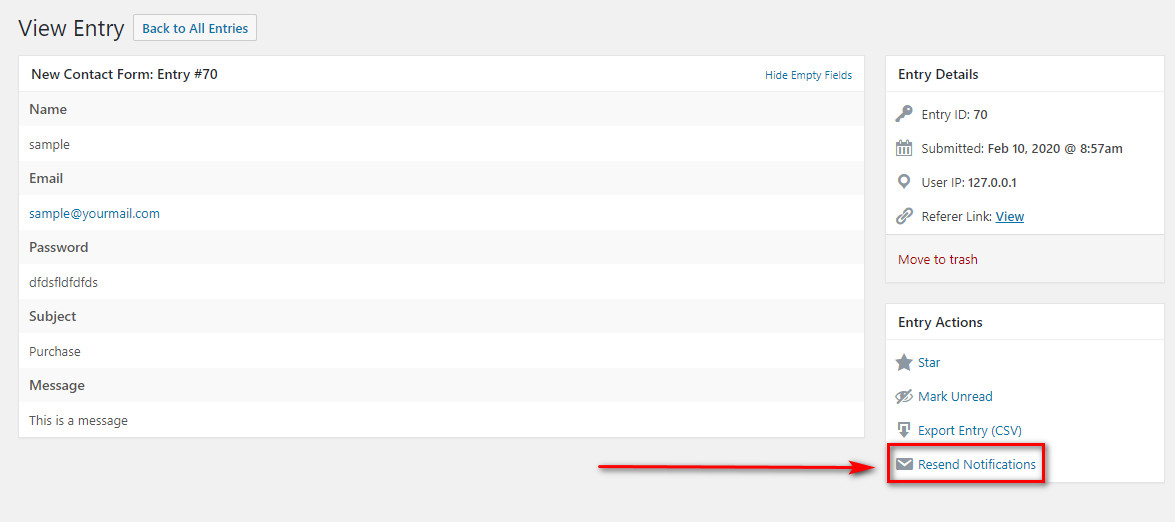
How to Resend Notification for Individual Form Entries? (Pro Feature) #
With the Everest Forms (Pro), you can resend notifications for each individual form. For this, go to Everest Forms → Entries. Then, you can view any form entry and click Resend Notifications.
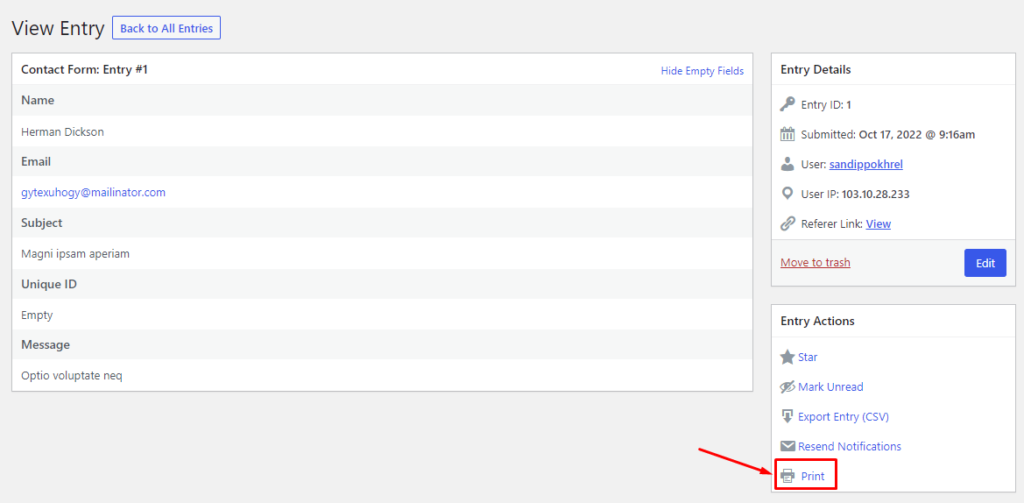
How to Print Individual Form Entry? (Pro Feature) #
With the Everest Forms (Pro), you can print each individual form. For this, go to Everest Forms → Entries. Then, you can view any form entry and click Print.
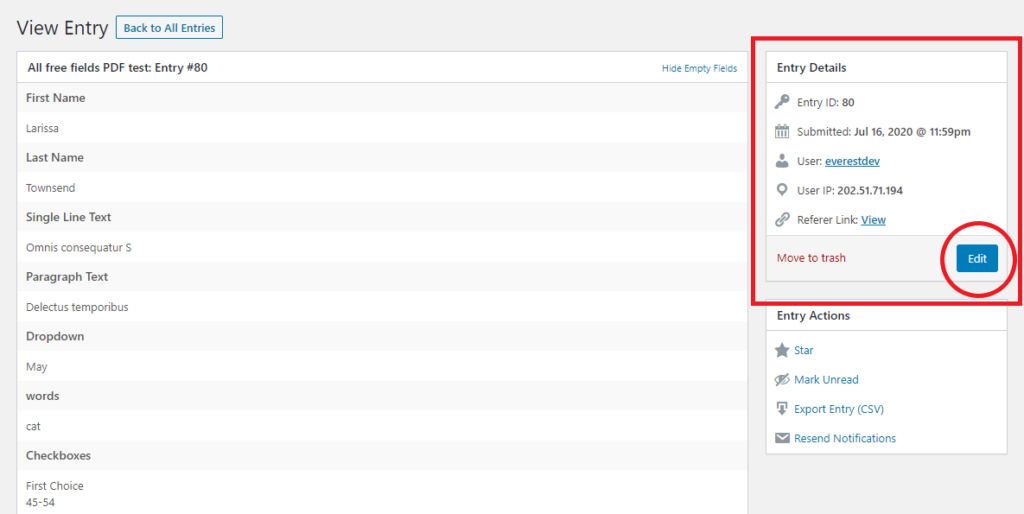
How To Edit Form Entries? (Pro Feature) #
Now you can also Edit the Form Entries that you received from your users. To do so, Click on the View link on the entry that you want to edit. After the Entry Details are shown, you will see the section highlighted in the screenshot.
Click on the Edit button and the field values will show up in the input boxes. After that, change the data that you want to change and then click on Update.
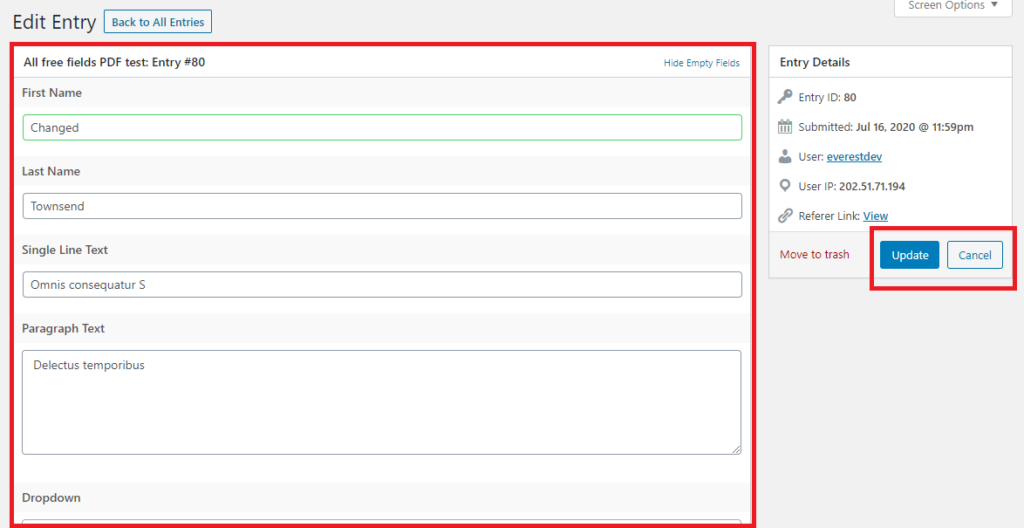
All Changes to the Entry Will be saved. Now, you can successfully edit the form entries this way.
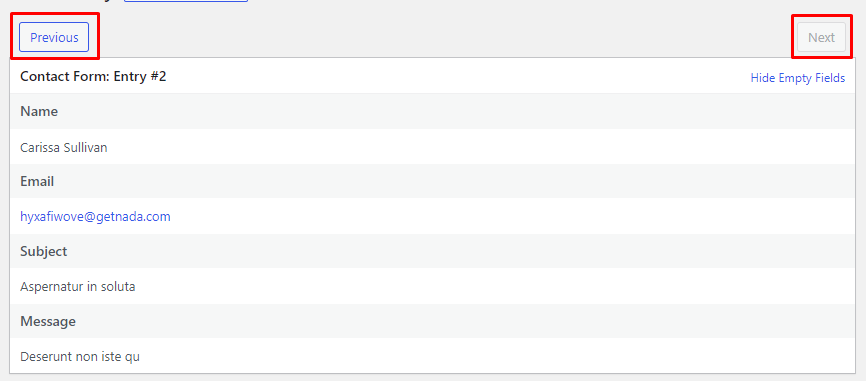
You can use the Next/Previous button to go to another entry from the single entry page.
How to show/hide the column items on the Entry page? #
You can show or hide the items on the Entry page’s column by clicking on the settings icon on the right-most section of the column title.
After clicking this icon, the following pop-up screen will appear.
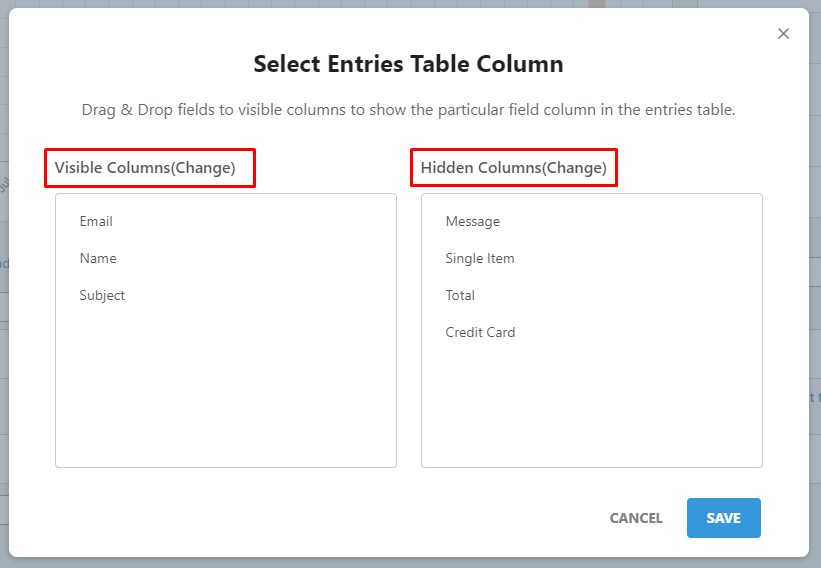
- Visible Columns: All the items on this column are visible on the entry page.
- Hidden Columns: All the items on this column are hidden.
Drag and drop the items between these columns as per your need.


