
How do you get the Google Client ID and Secret key? #
Now, you will need the Google Client ID and Secret key to authenticate with your Google Account. Please follow the steps below to get these keys.
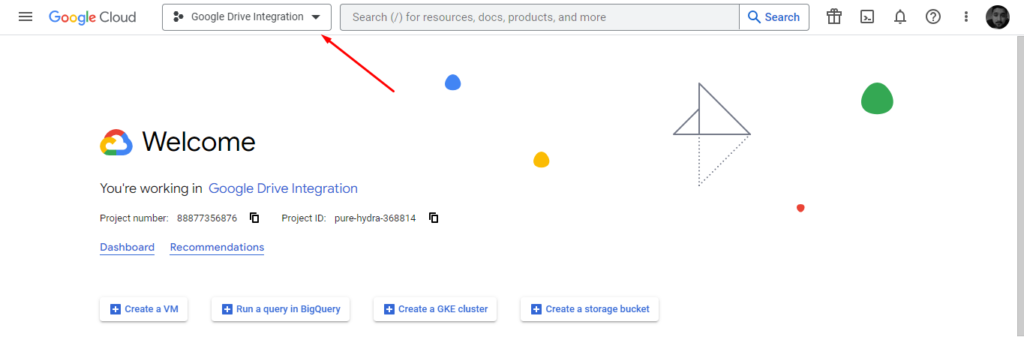
- Go to: https://console.cloud.google.com/
- Click on the option “Select a project”, after which a window will pop-up. Then, click on the “New Project” option.
Please note that if you already have a project, the project’s name will appear in the place of ‘Select a Project‘. For example, in the image below, ‘WPEverest‘ should be clicked.

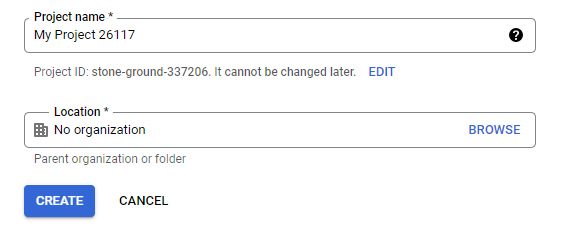
- Add your project name.
- Browse your location OR choose the option, “No Organization”.
- Click on the “Create” button.
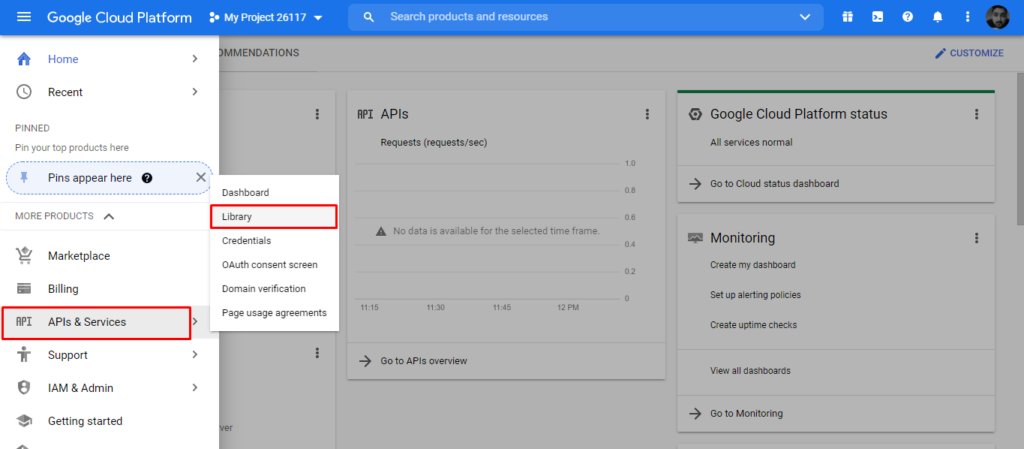
- Navigate to the left and go to API & Services > Library
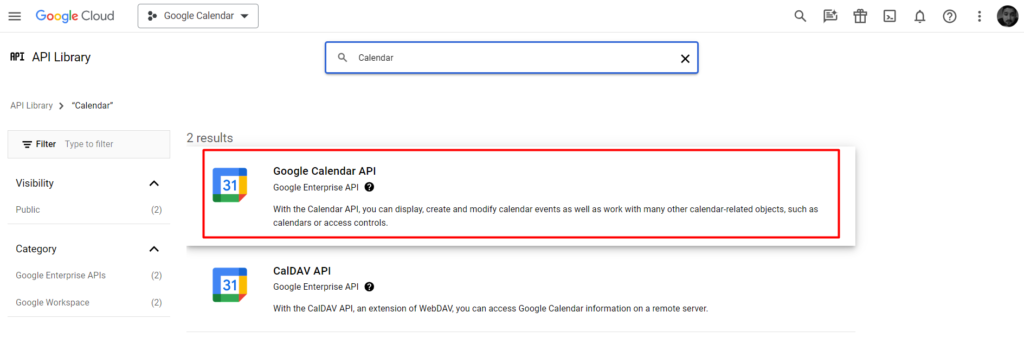
- Search ‘Google Calendar’.
- Click on ‘Google Calendar API‘.
- Click on ‘Enable‘.
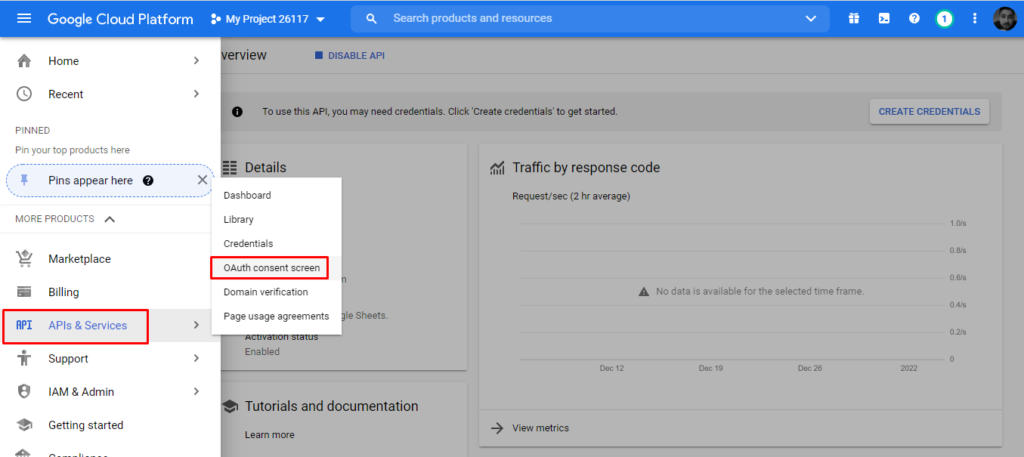
- Navigate to the left and click on “Oauth Consent Screen.”
- Select the “External” radio button.
- Click on the “Create” button.
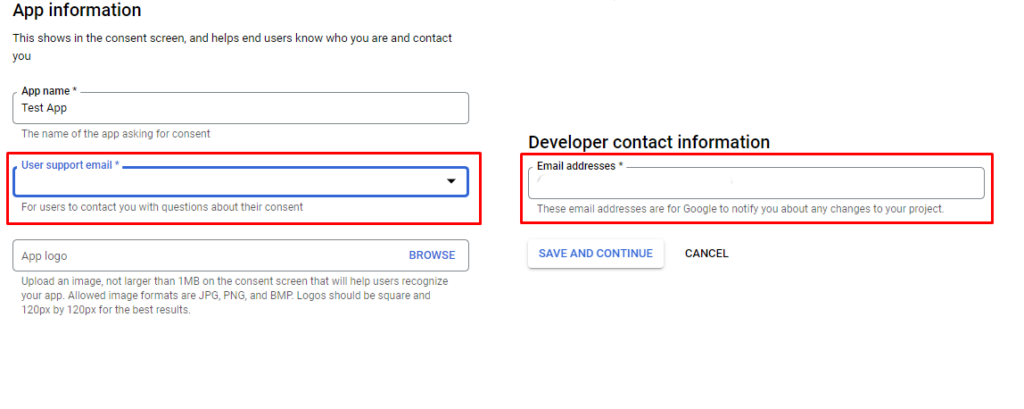
- Add an “Application Name” in the field.
- Add User Support Email.
- Add your email address in the Developer contact information option.
Please note, that the User Support Email and Developer contact information can be the same email address.
- Click on the “Save” button.
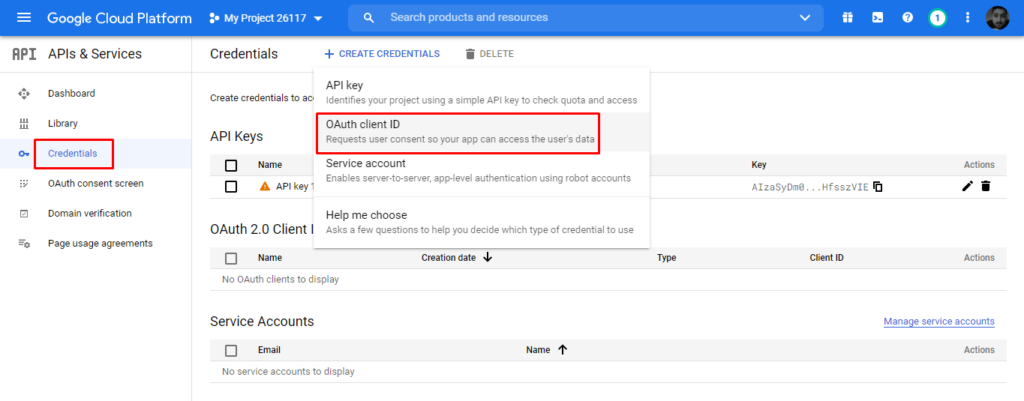
Once you have created the app, you will have to publish it. For this, go to the OAuth Consent Screen and click on ‘Publish App’. - Navigate through the menu on the left and click on “Credentials”.
- Click on the “Create Credentials” button.
- Select “Oauth Client ID” from the dropdown menu.
- Select the Application type “Web Application“.
- Add the text you desire in the field under “Name”.
- Add your site’s URL under “Authorized redirect URIs”.
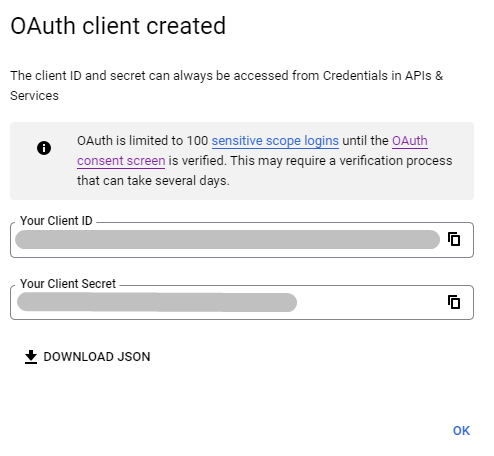
Note: If your site’s URI is https://example.com, then the redirect URIs should be https://example.com/ where the trailing ‘/’ is a must. - Click on the “Create” button and you will see a popup window with the Client ID and Client Secret.
Integrate the Google Calendar App with Everest Forms #
Creating a Connection with Google Calendar #
Once you have created the client ID and secret, you can connect it with the Everest Forms. For this, go to Everest Forms > Settings > Integration > Google Calendar
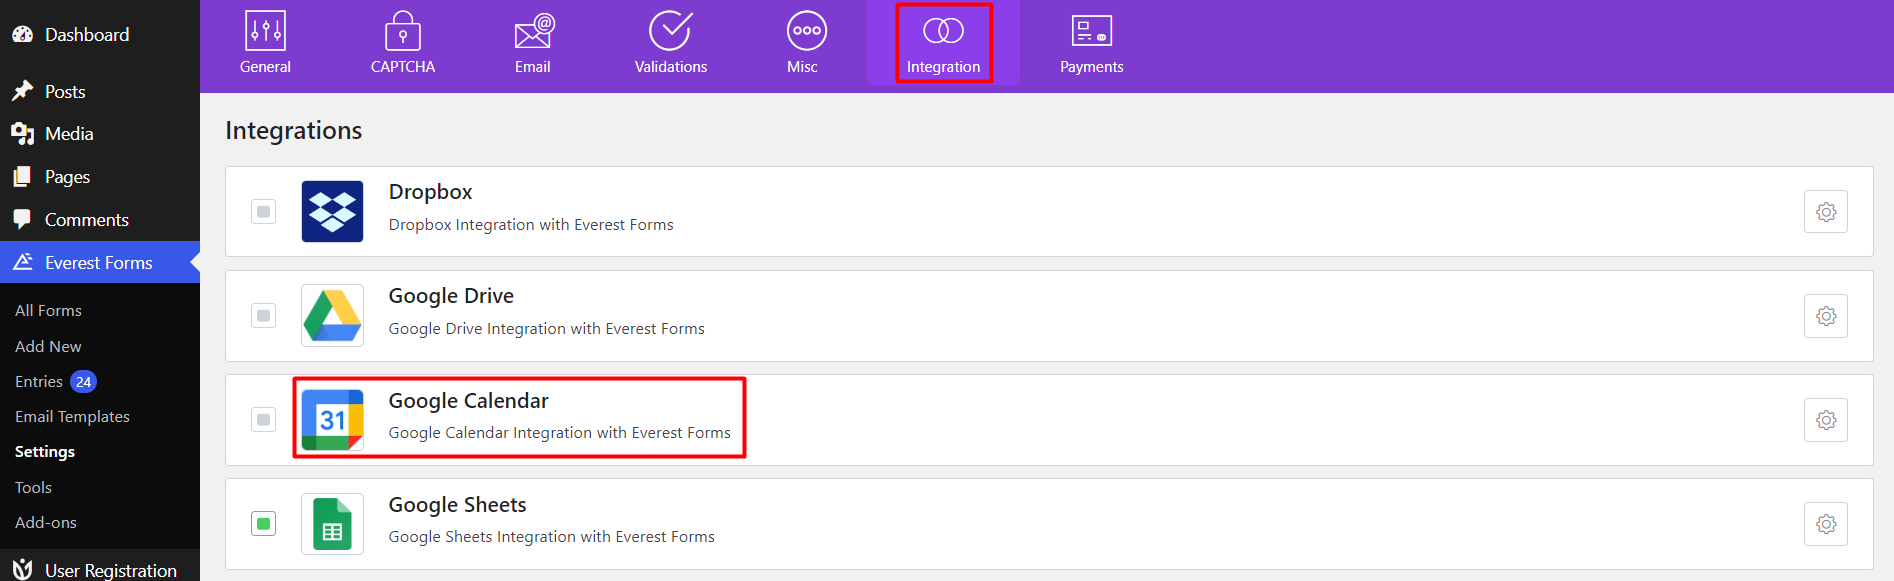
Click on the Settings icon. Now, you will see the following screen.
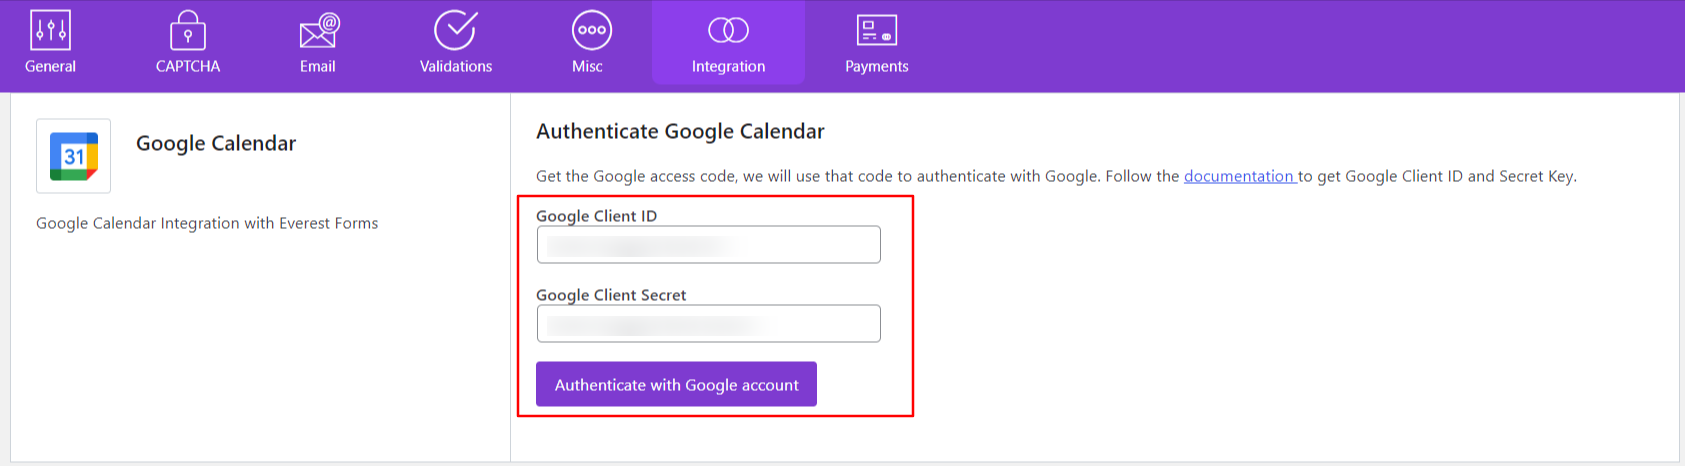
Add the generated credentials from Google to this box and click on ‘Authenticate with Google Account‘.
Integrating Google Calendar in Forms (Appointment Scheduling) #
Once you have connected the Google Account with the Everest Forms plugin, you can follow the steps below to enable appointment scheduling with Google Calendar via Everest Forms.
- Go to Everest Forms > All Forms.
- Click on Add New, select a template, and give the name for the form.
- Search for the Date/Time field and drag it to the form fields space.
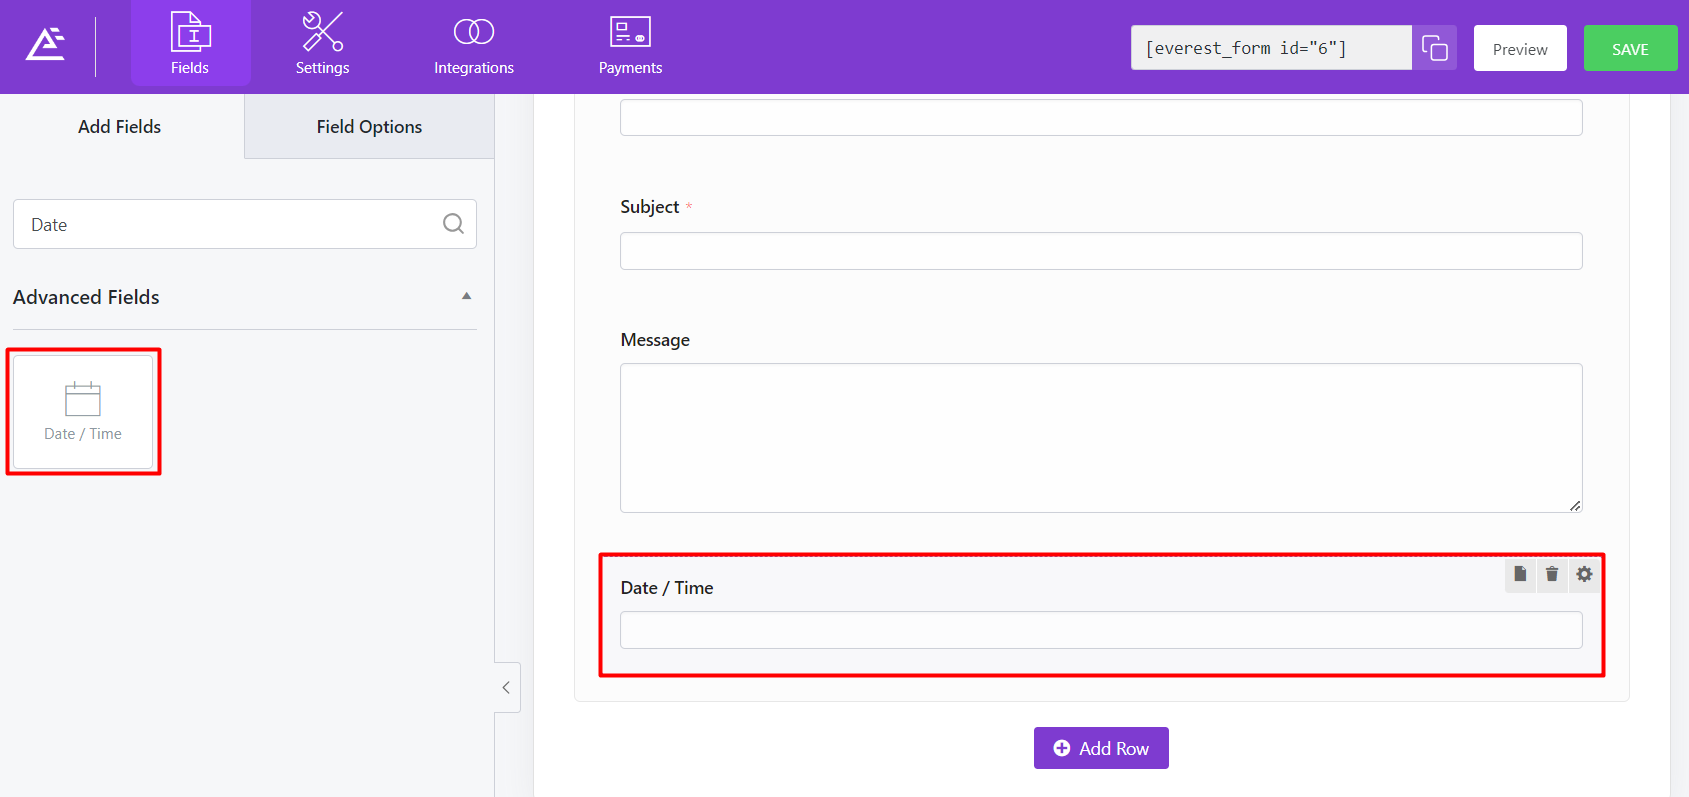
- Click on the Date/Time field to get to the Field Options.
- Go to Advanced Options > Appointment Scheduling.
- Enable this option.

This will now enable the Google Calendar. You can choose the field for the Event Title and Event Description. The inputs on these fields will then be submitted to the Google Calendar as the title and description of the events respectively, along with the chosen date.


