Integrate the world’s leading CRM platform with one of the best form plugins in the game with the help of the Everest Forms-Salesforce add-on. The following documentation will let you know how to do this.
Installation #
- Firstly, you need to purchase the Everest Forms Pro plugin.
- After the successful purchase, you will get the plugin zip file under your WPEverest account page.
- Now, you can download the Everest forms pro plugin and Salesforce add-on from there.
- Through your WordPress Dashboard, visit Plugins -> Add New -> Upload and then choose the downloaded zip file and then install and activate it.
- Now you are ready to use this add-on for your site.
Alternative Method:
- Once you have entered the Everest Forms Pro license on your site, go to Everest Forms > Add-ons.
- Search for the ‘Salesforce‘ add-on.
- Click on ‘Install‘.
- Once the installation is finished, click on ‘Activate‘. The add-on will be activated.
Setup and Configuration #
You will need the Salesforce Consumer Key and Consumer Secret to integrate Salesforce with the Everest Forms. Follow the steps below for this.
Getting Consumer Key and Consumer Secret #
At first, make sure to switch to Salesforce classic by clicking on the Account Icon.
- Log into your Salesforce account.
- Click Setup.
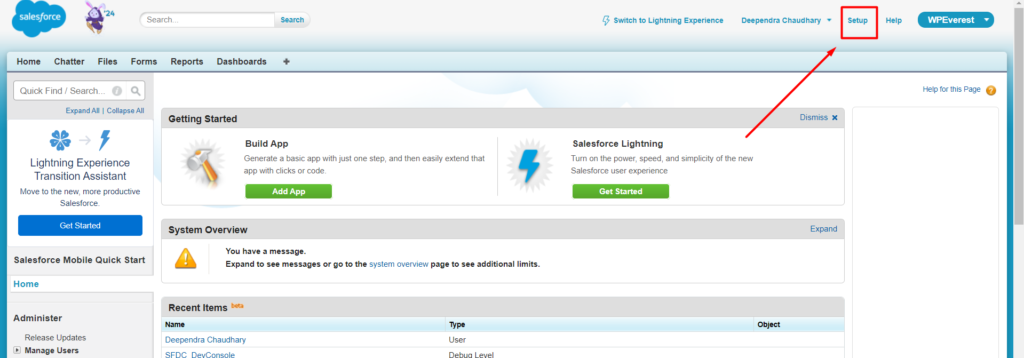
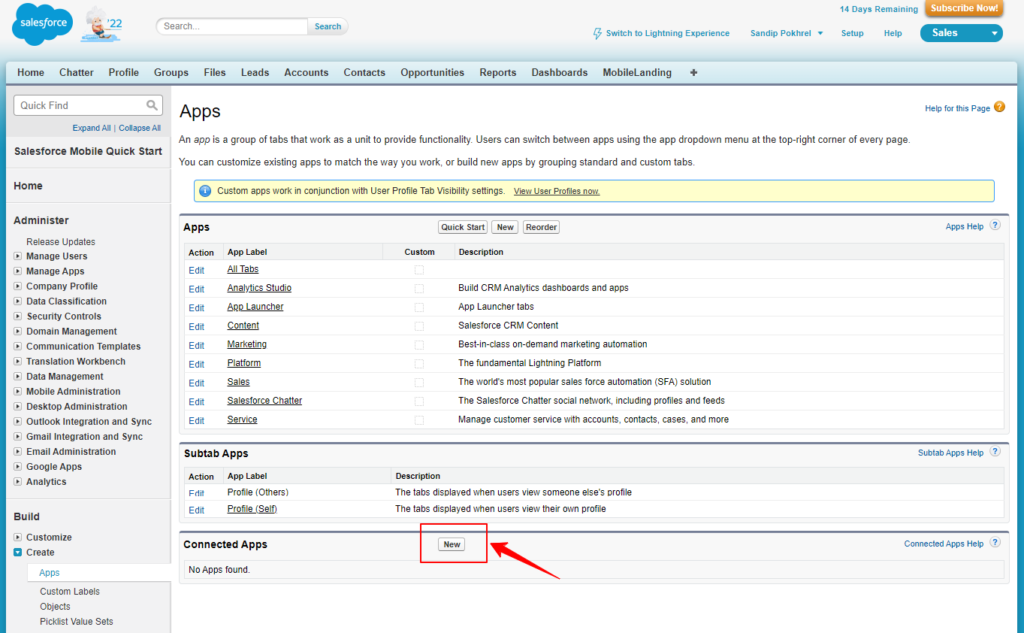
- On the left-hand side, you will see a sidebar. Click on Create > Apps > Manage your custom apps.

- Now, click on New.
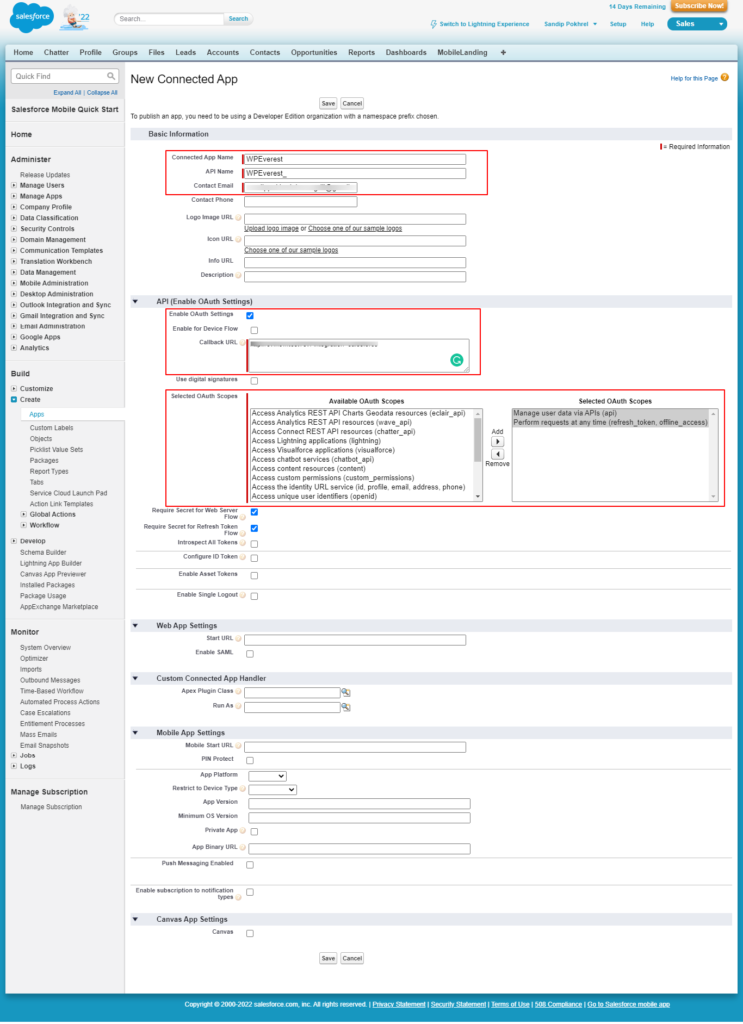
- Choose a Connected App name; Salesforce will generate an API name for you based on your chosen name.
- Provide a contact email address.
- Select “Enable OAuth Settings”.
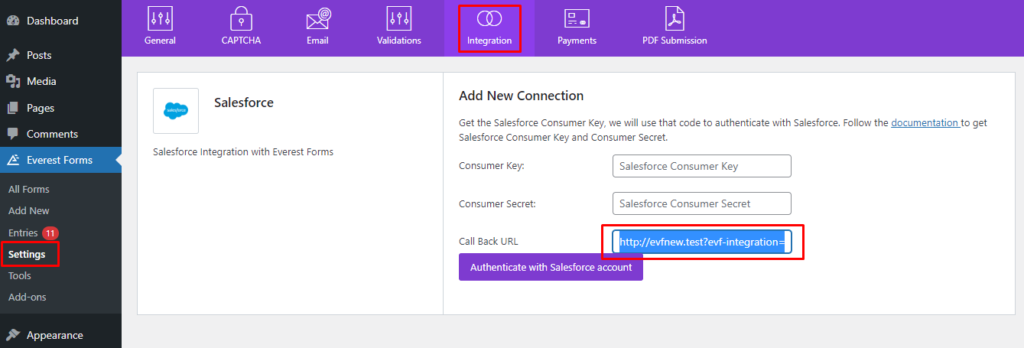
- Add a callback URL. For the callback URL, go back to your site’s Dashboard. Go to Everest Forms > Settings > Integration. Select Salesforce. You will see the callback URL. Copy and paste it over here.
- Choose the following two scopes:
- Manage user data via APIs(api).
- Perform requests at any time(referesh_token, offline_access).

- Click ‘Save‘.
- You will now be redirected to the App Details page. Click on ‘Manage Consumer Details‘ for the Consumer Key and Consumer Secret.

Now, you are done with creating a new app. You can copy both the consumer key and secret on a clipboard for integrating Salesforce with the Everest Forms.
Before proceeding to the next step, it is advised that you hold off for at least 10 minutes. You'll encounter an error in the next step that looks like this if you try to move quickly:

error=invalid_client_id&error_description=client%20identifier%20invalid

Not to worry! This message just indicates that Salesforce hasn't set up your connection. It's best to give yourself a little more time before trying again.
If you get the following error in the URL or a 404 error,
invalid_request
missing required code challenge
Turn off "Require Proof Key for Code Exchange (PKCE) Extension for Supported Authorization Flows" checkbox in your Connected App's settings. It is located under the Scopes and Callback URLs.
Integrating Salesforce with Everest Forms #
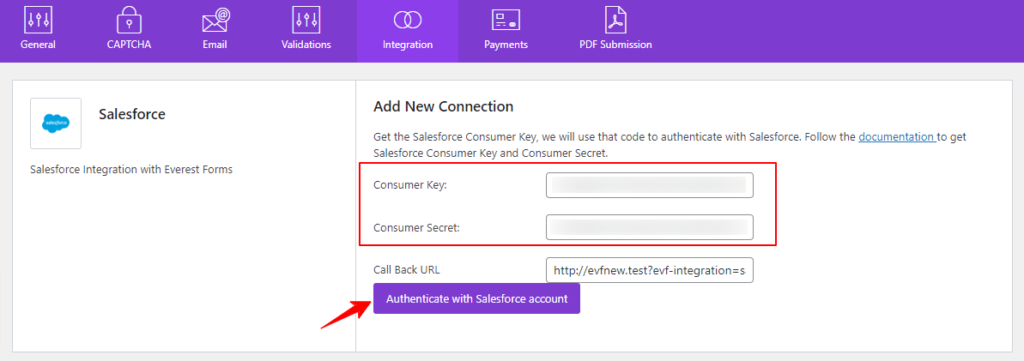
Once you have generated and copied the Consumer Key and Secret from Salesforce account, go to Everest Forms > Settings > Integration > Salesforce. Add the keys to the ‘Consumer Key and Secret‘ box. Click on ‘Authenticate with Salesforce Account’.
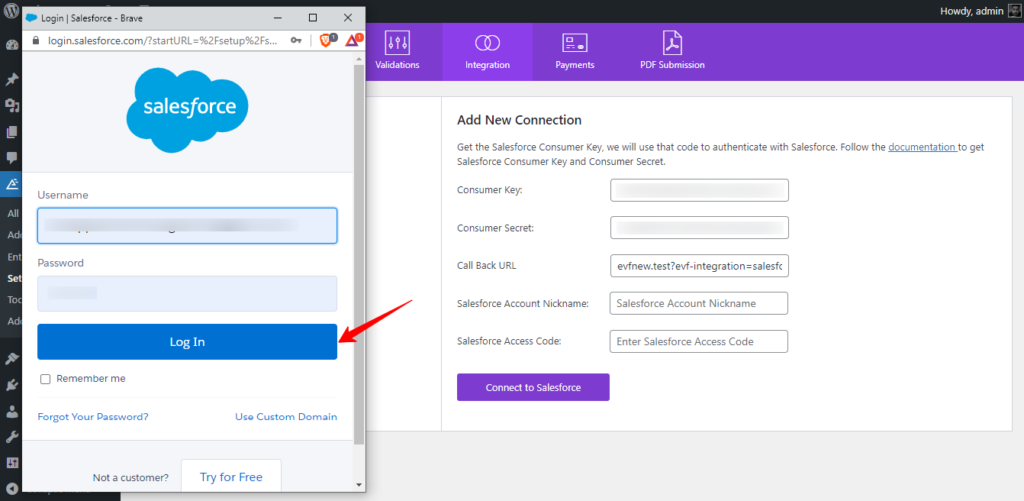
After clicking the above button, you will be asked to log in to your Salesforce account. Enter the username and password and click on ‘Login’.
After logging in, you will be asked for permission, click on ‘Allow‘.
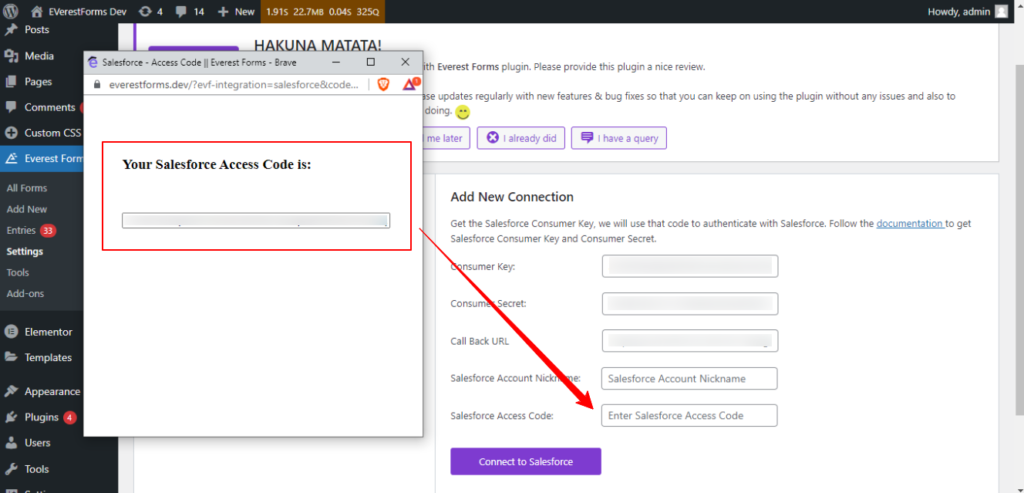
Add this code to the ‘Salesforce Access Code‘ option. Give a Salesforce Account Nickname. At last, click on ‘Connect to Salesforce‘ and you will be connected to the Salesforce account.
Adding Connections for individual forms #
Once you have set up the required credentials on the main settings, it’s time for you to add a new connection for your forms. For this, go to the required form’s editor page. Click on ‘Integration’ from the available tabs. You will find an option called ‘Salesforce‘ from which you can add a new connection.
- Click on the ‘Add New Connection‘ button and a pop-up will appear. Add the name of the connection.
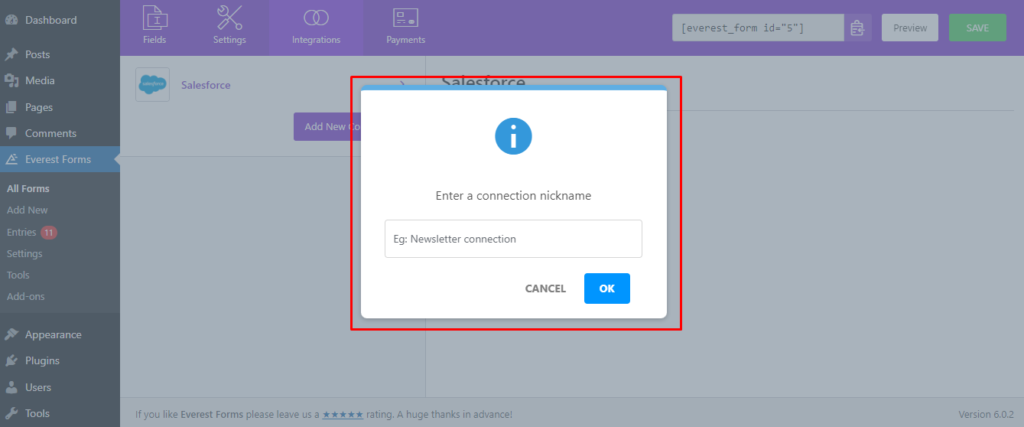
Click on ‘OK‘ after adding the name and the connection is added.
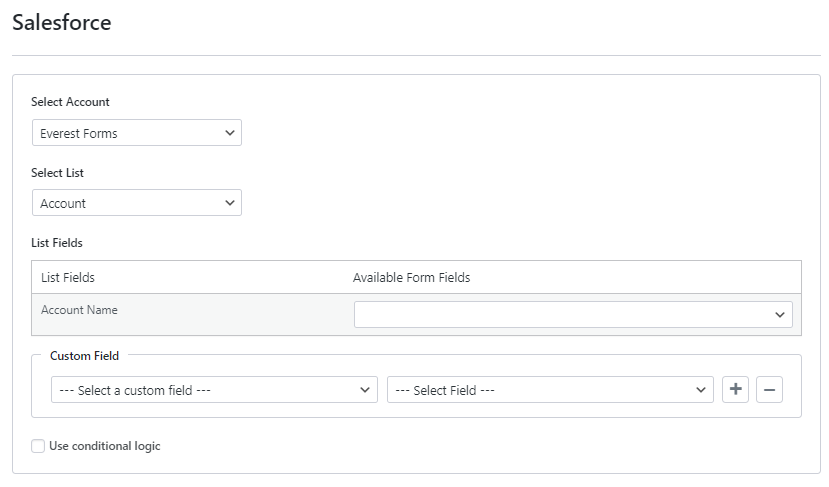
Now, select the required account, lists and then map the fields accordingly. Also, you can map the Everest Forms fields with the Salesforce’s custom fields.
How to use conditional logic for Salesforce connections? #
To use conditional logic, enable the option by ticking the ‘Use Conditional Logic’ option at the bottom of every connection you make.

In the above example, the form sends data to the Salesforce account only if the First Name is ‘Everest’.
Note: You can add more than one connections.


