Everest Forms Repeater Field add-ons help you to create a form that comprises a set of sub-fields. These sub-fields will have the property of being repeated more than once while you are editing the content.
You can add any field from the available ones and assign them as sub-fields allowing you to create and organize complex form data with ease.
Installation #
- Firstly, you need to purchase the Everest Forms Pro plugin.
- After the successful purchase, you will get the plugin zip file under your WPEverest account page.
- Now, you can download the Everest Forms Pro plugin and Repeater Fields addon from there.
- Through your WordPress Dashboard, visit Plugins -> Add New -> Upload and then choose the downloaded zip file and then install and activate it.
- Now you are ready to use this add-on for your site.
Configuration #
Once you have completed the above installation process you will be able to use the repeater field feature for every individual form.
For this, go to Everest Forms > All Forms and choose the desired form where you would like to use this feature.
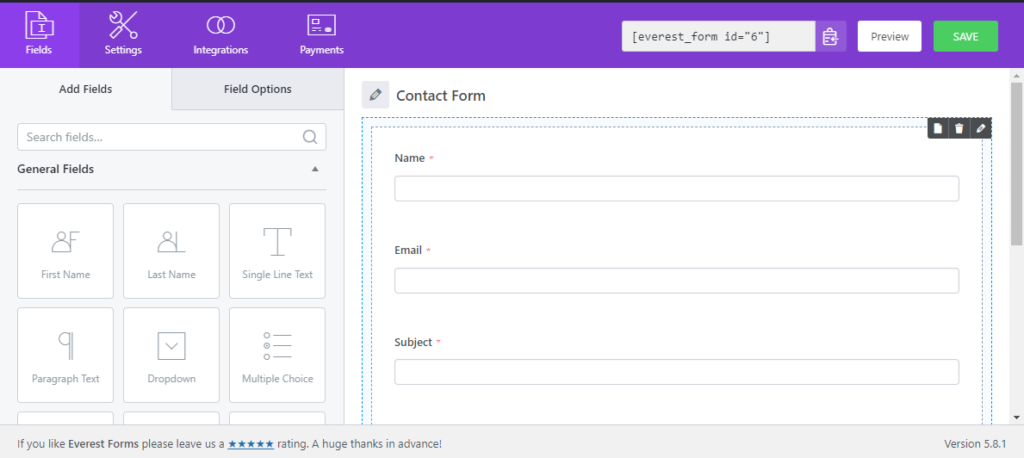
Now, edit the required form and you will be redirected form builder page. This page will look like below:
On the Form Builder, you can find ‘Add Repeater Row’ just below the ‘Add Row’ option.
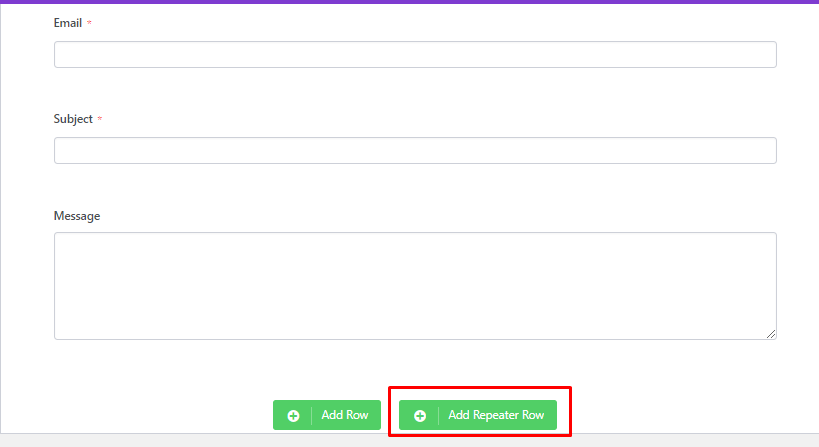
- Click on the ‘Add Repeater Row’ option to add a new row that will act as the repeater row.
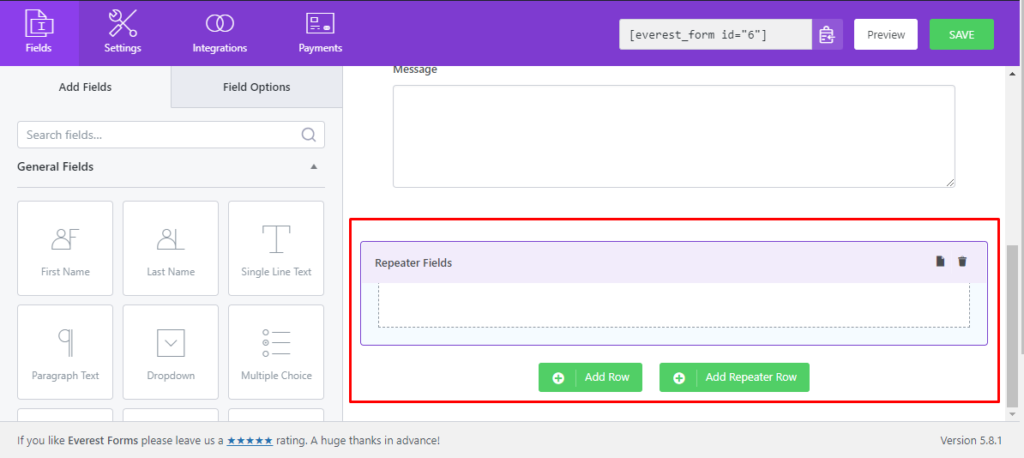
- Drag and drop required fields into this row.
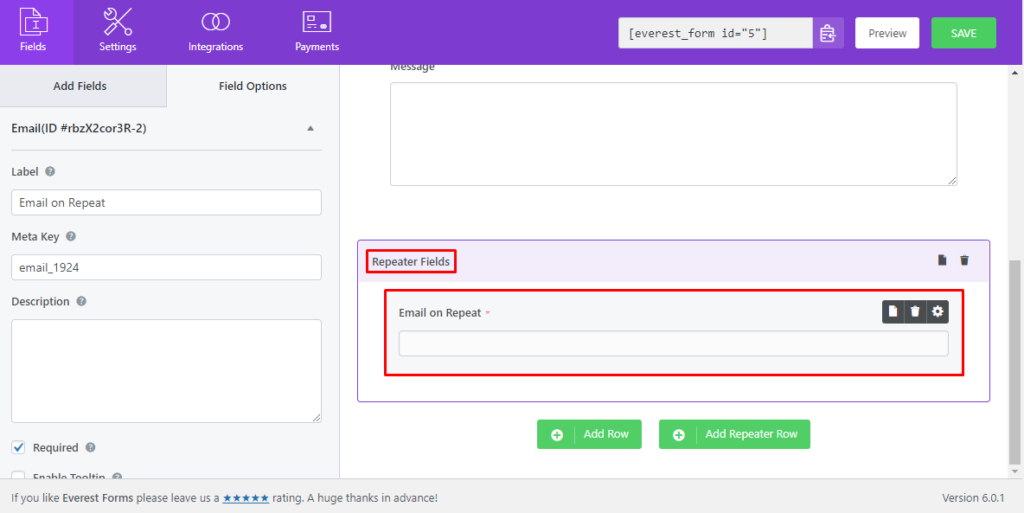
Once you have completed adding fields to the Repeater Row, you can select different settings for this row from ‘Field Options. To do this, click on the Repeater Fields, and on the left-hand side, you will be seeing the Field Options for this particular Repeater Fields.
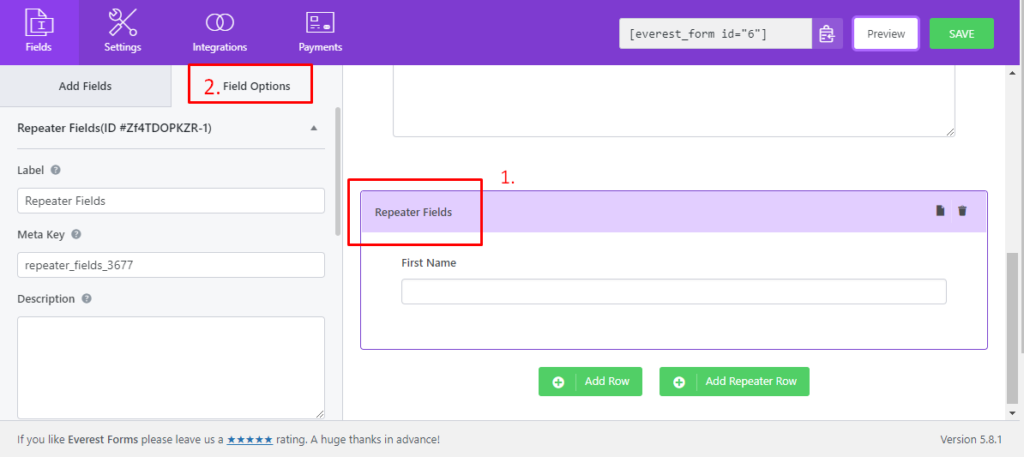
Field Options consist of the following properties:
- Label: To add the Field Label for the Repeater Fields.
- Meta Key: To add a custom meta key.
- Description: To add a description of the field.
Advanced Options #
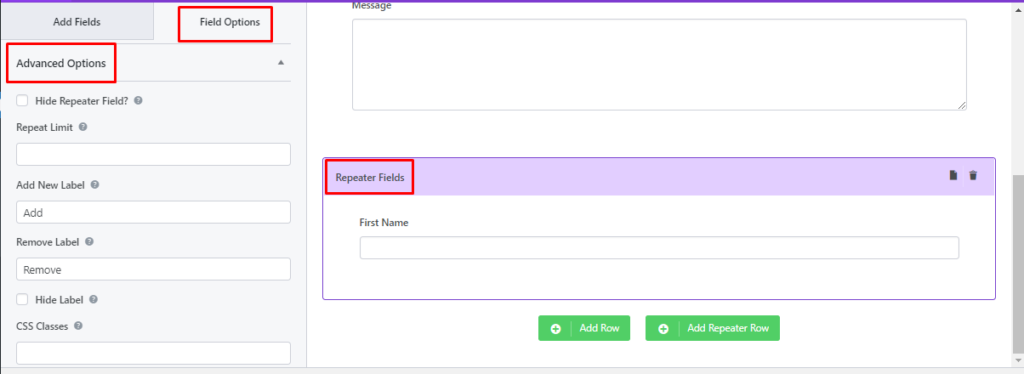
- Hide Repeater Field?: Enable this option if you don’t want to show the Repeater Fields.
- Repeat Limit: Maximum number of times a user can add repeater fields.
- Add New Label: To change the text in the ‘Add’ button.
- Remove Label: To change the text in the ‘Remove’ button.
- Hide Label: To hide the Repeater field label.
- CSS Classes: To enter a custom CSS class where multiple classes should be separated with space.
Conditional Logic #
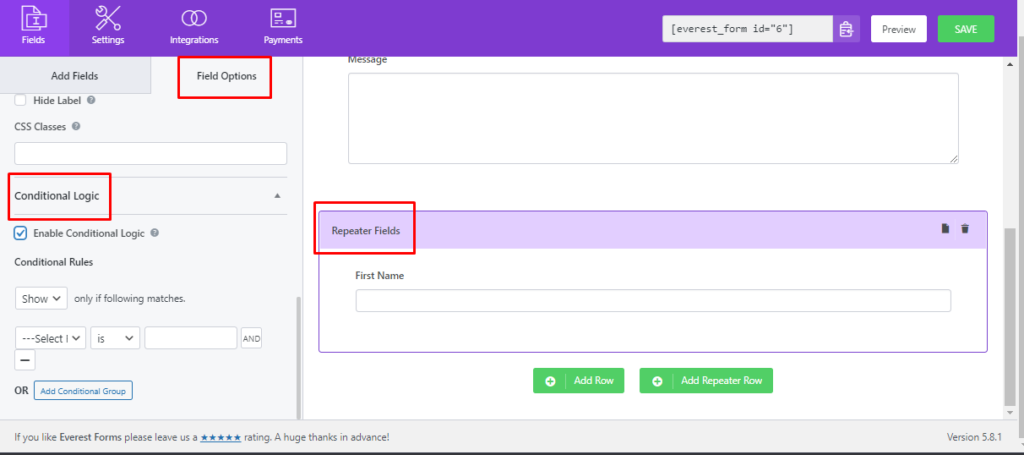
- Enable Conditional Logic: Enable this option to add conditional logic to the Repeater Field. To know more about conditional logic and its rule please visit https://docs.wpeverest.com/everest-forms/docs/conditional-logic/.
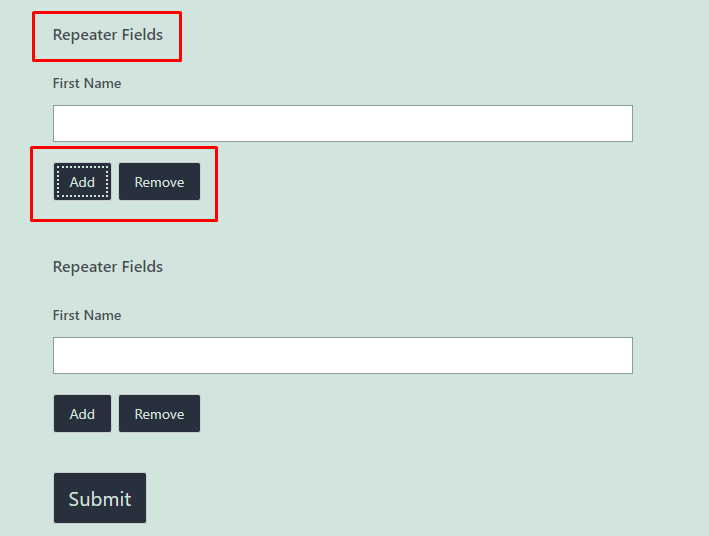
The form will appear as below in the front.
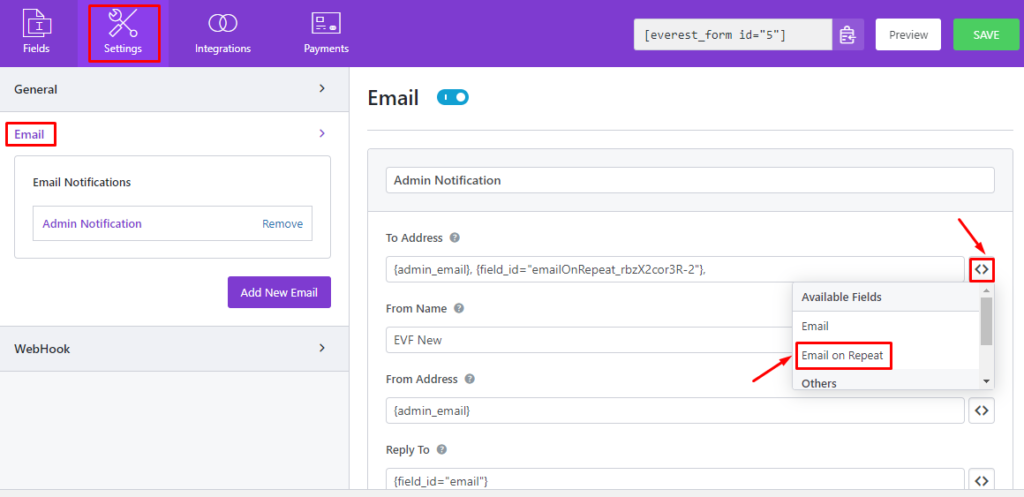
Email Field Support #
The repeater row now supports email fields. You can allow users to add multiple email addresses as per the requirement.
On the email settings of the form(Settings > Emails), you can add the repeater row’s email field as well from the available smart tags. On the To Address option, click on ‘<>’ and choose the email field from the repeater row. Now, once the form is submitted, the email entry will be sent to all the email addresses from the Repeater Row.
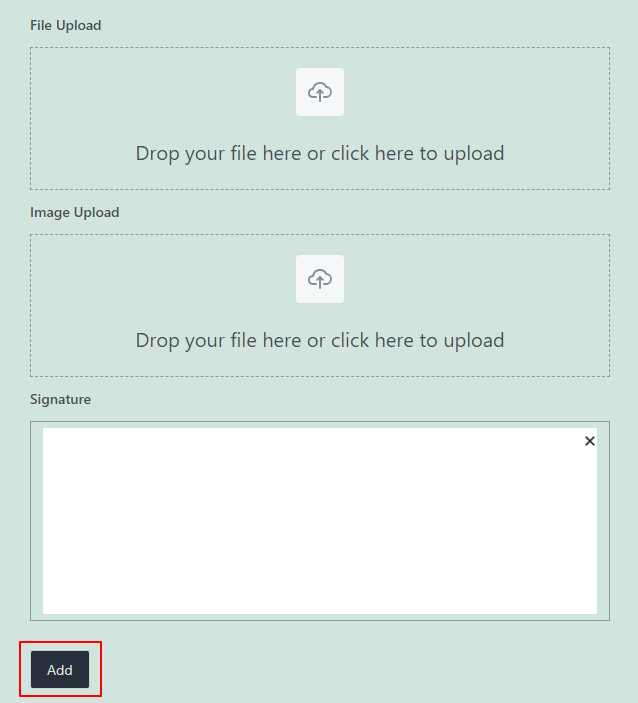
Note: The repeater row can also support File Upload, Image Upload and Signature fields.
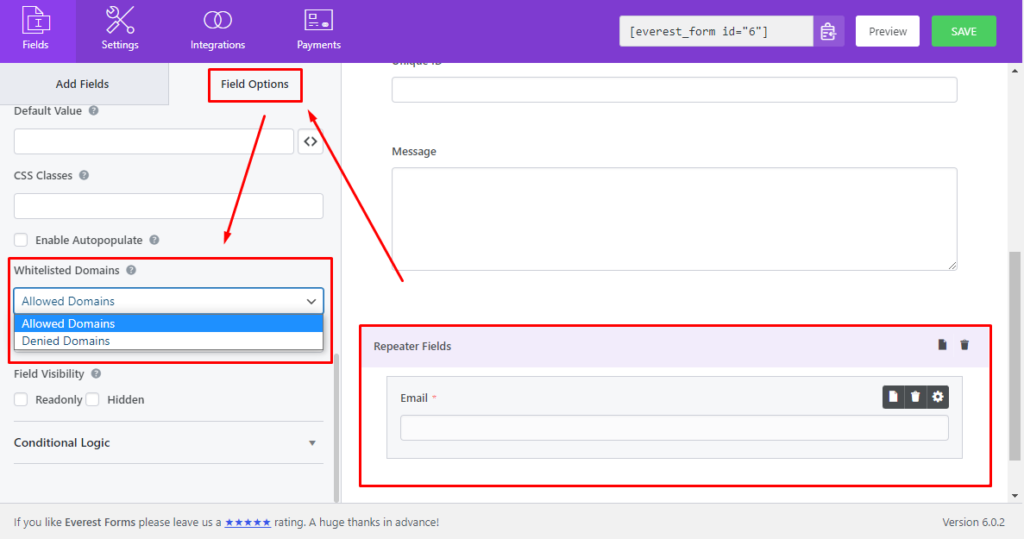
Whitelist Domain in Email Field for Repeater Fields #
You can whitelist domains for the email field on the repeater fields. For this, go to Field Options > Advanced Options. In the Whitelist Domain section, you can choose either Allowed Domains or Denied Domains.