
Smart Tags are a very handy feature that comes with
Let’s say you have a form with following fields for your site.
- Name
- Product Name
- Subject
- Message
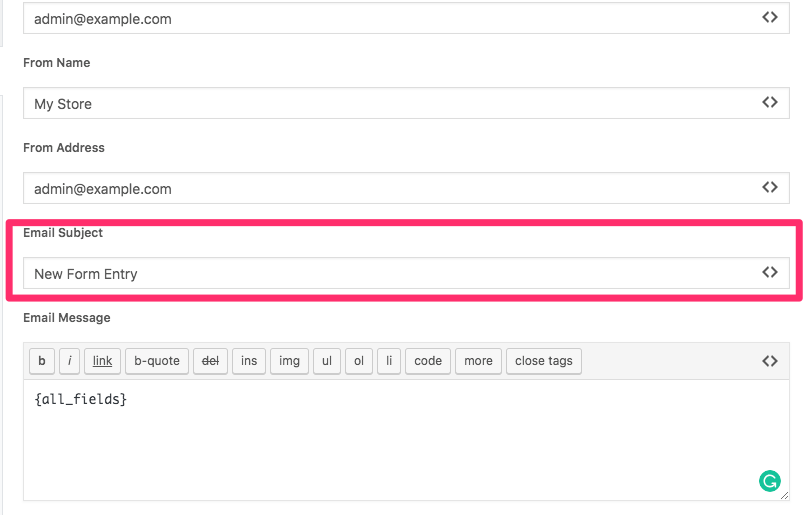
Now every time a user comes to your site, fill up the form and submit it, the admin receives an email with all these details. The subject by default for the email would be New Form Entry. This is not very helpful and admin has to open up the email to know the details of the entries.
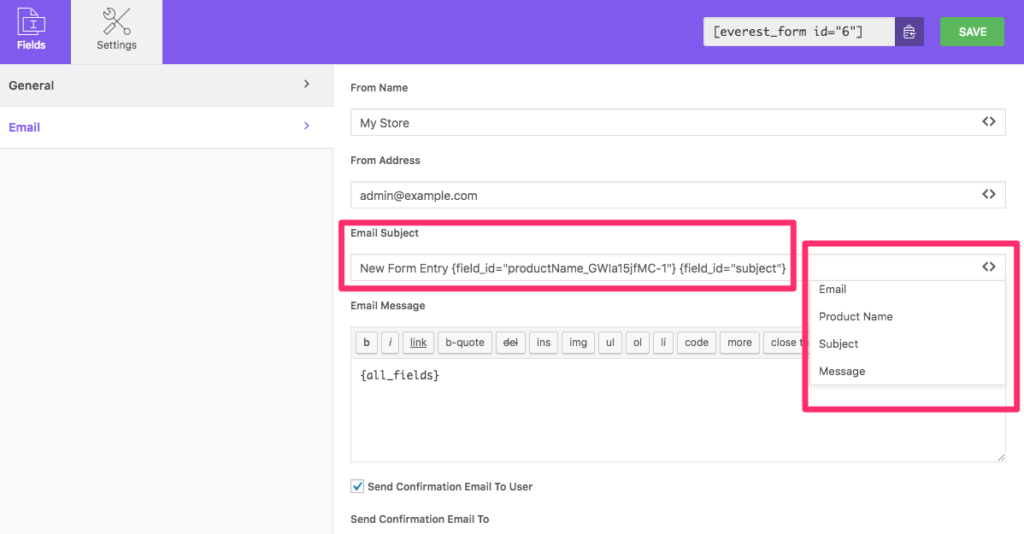
Now with the help of a smart tag. You can make your email subject dynamic by utilizing the Product Name field and Subject Field. To use the smart tag.
- Click on the < > icon on the side of the Email Subject field. It will open a small scrollable box with all the appropriate fields in your form that can be used as a smart tag.
- Now click on the field in the box that you would like to use as smart tag and the corresponding smart tag code will be automatically copied to the Email Subject Field.
- For this article case, I have used Product Name Field and Subject field. Your new email subject would be New Form Entry + Product Name + Subject
This subject is more elaborative and appropriate.
Now if some user fills up the form with following details as shown in the image below.
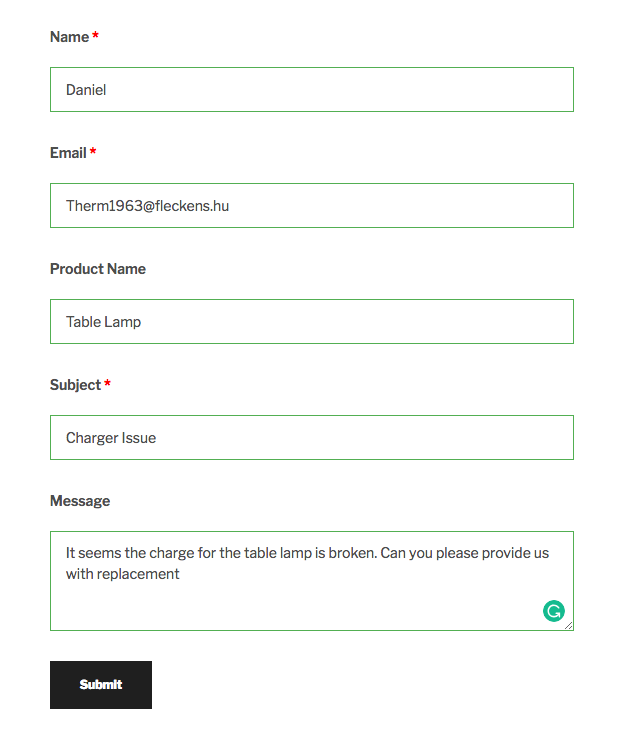
The email subject will be the New Form Entry Table Lamp Charger Issue.
This will help the admin to find out which product the email is related to and what the issue is with a glance at their inbox without the need to open the email.

Smart Tags #
You can use the following smart tags while modifying the email subject and contents:
{current_date} – Shows Current Date
{current_time} – Shows Current Time
{admin_email} – Displays admin email
{site_url} – Displays the Site’s URL
{page_title} – Displays the page title where the form is located
{page_url} – Gives the page’s URL
{page_id} – Gives the page’s ID
{post_meta_key=whatever} – Gives the Post’s Meta
{author_email} – Shows the author’s email
{author_name} – Shows the author’s email
{form_name} – Shows the form’s name
{user_ip_address} – Gives the user’s IP address
{user_id} – Gives the user’s ID
{user_meta key=whatever} – Gives the user’s meta
{user_name} – Shows the username
{display_name} – Shows the user’s Display Name
{form_ID} – Shows the form’s ID.
{first_name} – Shows the First Name
{last_name} – Shows the Last Name
{user_email} – Shows the user’s email address
{user_role} – Shows the user’s Role
{referrer_url} – Shows the Referral URL
{current_data_and_time} – Shows the current date and time
{biographical_info} – Shows the Biographical Information
{uniue_ID} – Pass a unique ID value for each submission
{entry_id} – Pass the entry ID for each submission.
Note: The {entry_id} smart tag can only be used in the email content.


