This add-on integrated the Everest Forms plugin with Twilio and helps you to send SMS notifications to the users.
Installation #
- Firstly, you need to purchase the Everest Forms Pro plugin.
- After the successful purchase, you will get the plugin zip file under your WPEverest account page.
- Now, you can download the Everest forms pro plugin and SMS Notifications add-on from there.
- Through your WordPress Dashboard, visit Plugins -> Add New -> Upload and then choose the downloaded zip file and then install and activate it.
- Now you are ready to use this add-on for your site.
Alternative Method:
- Once you have entered the Everest Forms Pro license on your site, go to Everest Forms > Add-ons.
- Search for the ‘SMS Notifications‘ add-on.
- Click on ‘Install‘.
- Once the installation is finished, click on ‘Activate‘. The add-on will be activated.
Setup and Configuration #
Twilio API #
In order to use the SMS notification feature on the Everest Forms, you will have to add the Twilio API keys which can be obtained by following the given procedure.
- Log into your Twilio account.
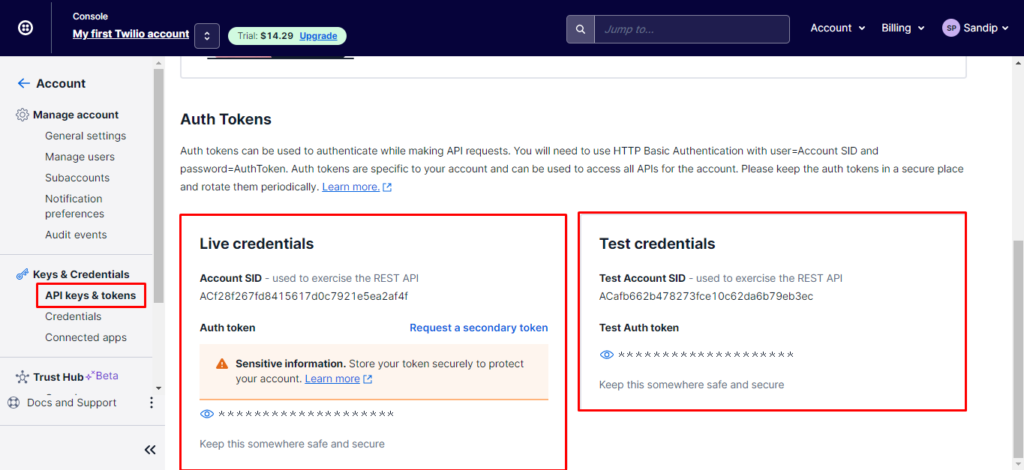
- From the left side menu, click on Settings. Or, on the Account section under API Keys & tokens.
- Under API Credentials, you will see both your Live and Test credentials. Copy these as they will need to be entered into your Everest Forms SMS Notification settings.

Adding the Twilio API keys on the Everest Forms Settings #
To add the above API keys to the Everest Forms, please follow the steps below.
- Go to Everest Forms > Settings > Integration.
- Click on the settings icon beside the ‘Twilio‘ option.

- Once you click the settings icon, you will see the following screen.

Now, enter the required keys and click ‘Authenticate with Twilio‘.
SMS Notification for Individual Forms #
Once the Twilio keys have been set up, you can now add the SMS notification to the individual forms. For this, follow the steps below:
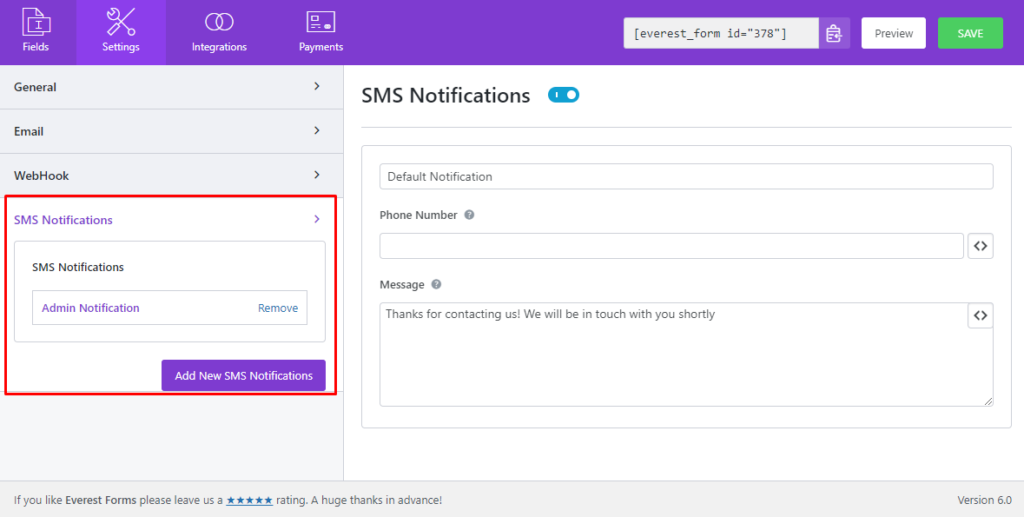
- Go to the Form Settings > SMS Notification.
- You will find option to add a new notification on the left hand side of the screen. The Admin Notification is the default one.

- On the right hand side, you will find three options. They are:
1. Notification Heading/Title: In the above image, ‘Default notification’ is the heading/title. You can customize it as per your need.
2. Phone Number Field: Here, you can assign a phone number field so that the user/admin can receive the notification. To choose the phone number field, click on the <> button and you will be shown with a list of valid fields.
3. Message: You can add your message on the message box which will then be sent on the notifcation.

Adding a new Notification #

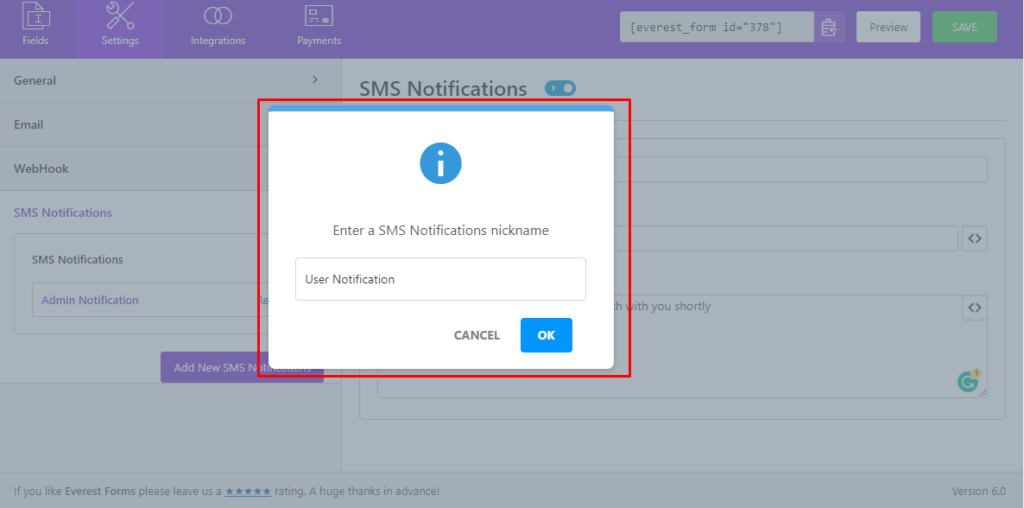
You can add more than one notifcation just by clicking the ‘Add New SMS Notification’ button. Assign a name to the notification and customize it as per your need.
Now, whenever a user submits the form, the notifcation will be sent to the assigned phone number.


