
Zapier is a free platform that allows you to connect different web applications and pass information between them. You can connect over 1500+ apps in Zapier. It is an amazing way to automate your work. And Everest Forms lets you integrate Zapier with your WordPress Forms with ease.
With the premium Zapier Add-on, you can use Zapier Webhooks and pass the form data to apps you require in Zapier. It not only saves you a lot of time but also increases efficiency in the use of web applications.
Installation #
- Firstly, you need to purchase the Everest Forms pro plugin.
- After the successful purchase, you will get the plugin zip file under your WPEverest account page.
- Now, you can download the Everest Forms pro plugin and Zapier add-on from there.
- Through your WordPress Dashboard, visit Plugins -> Add New -> Upload and then choose the downloaded zip file and then install and activate it.
- Now you are ready to use this add-on for your site.
Setup and Configuration #
Once you complete installing and activating both the plugin and the add-on, move on to set up the Zapier Add-on on your site.
If you don’t have an account in Zapier already then, you need to create it before you start.
Now, follow the simple instructions below to integrate Zapier with Everest Forms:
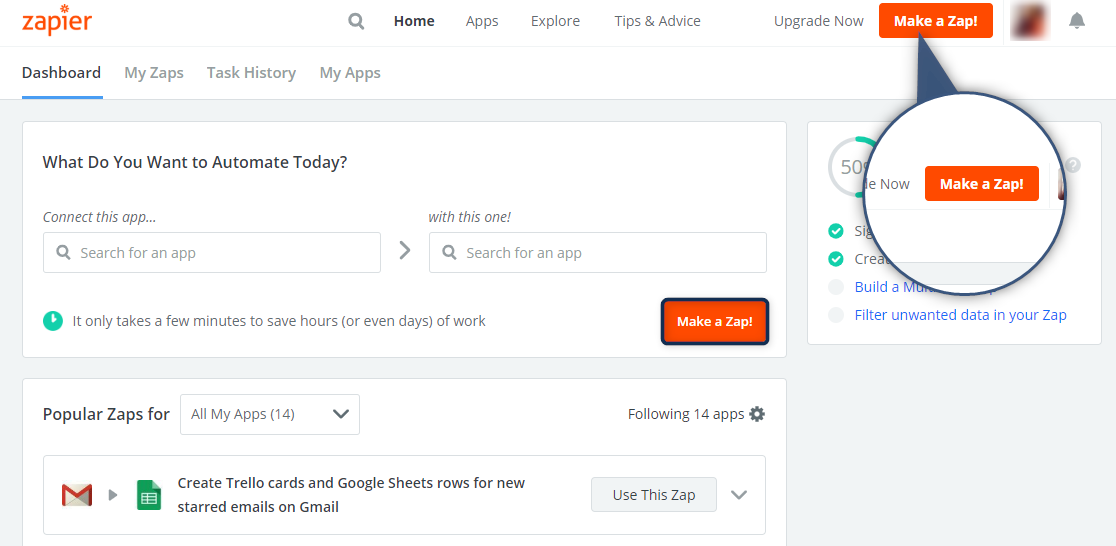
Step 1: Make a Zap! #
First of all, you need to make a Zap.
Zaps are automated workflows that connect two or more apps. A trigger from one app starts the workflow, and the job gets done. A zap is completed after the required Action is performed.
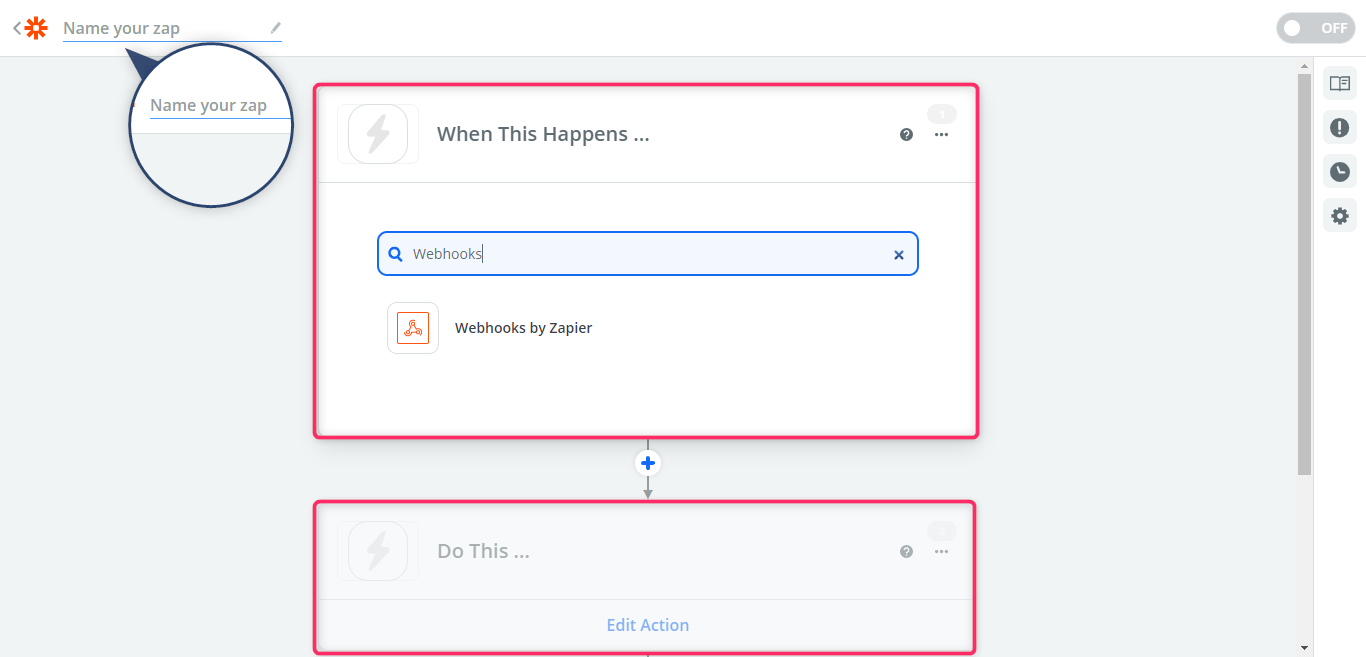
Step 2: Create a Webhook #
A Zap consists of two parts:
- When this happens
- Then do this
In the “When this happens” section, you need to select a trigger app. Here, we choose Webhooks by Zapier. Webhooks are the information that is automatically passed between the connected apps when any new items are created.
In the “Then do this” section, you need to choose an action app where the action takes place.
Also, you can name your Zap in the top left bar.
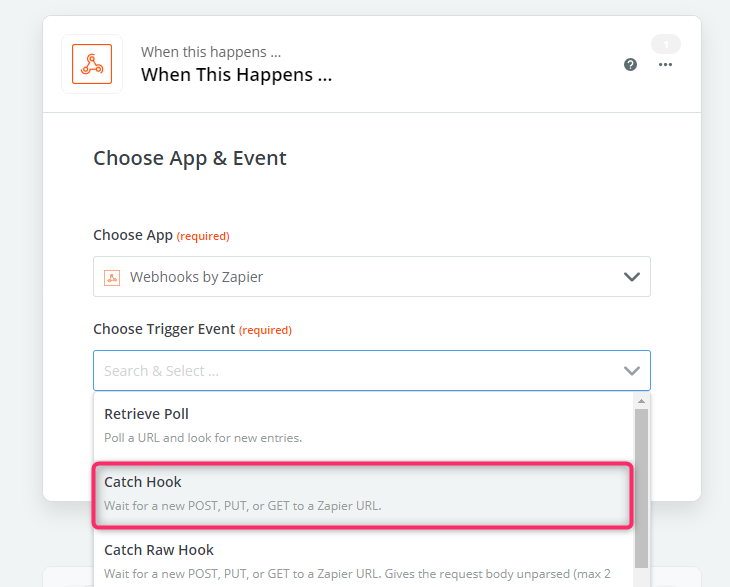
Step 3: Select Catch Hook #
Next, you need to Choose Trigger Event. You need to select the Catch Hook option which allows you to pass information through the Zapier URL.
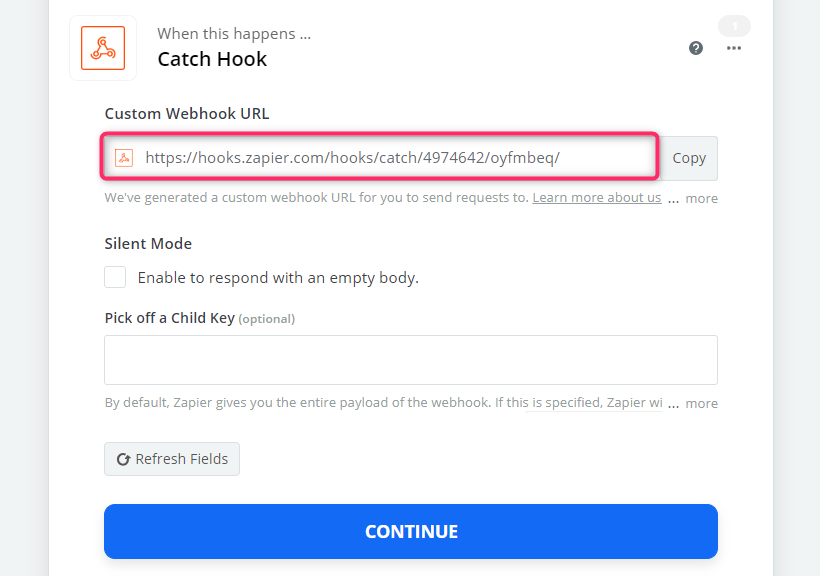
Step 4: Copy your generated Webhook URL #
After your Custom Webhook URL is created, copy it to Everest Forms settings.
Step 5: Set up Zapier in Everest Forms #
Now, navigate to Everest Forms->Select your form->Settings->Integrations->Zapier. First, check the Enable Zapier option. Then, on Webhook URL, paste your copied webhook.
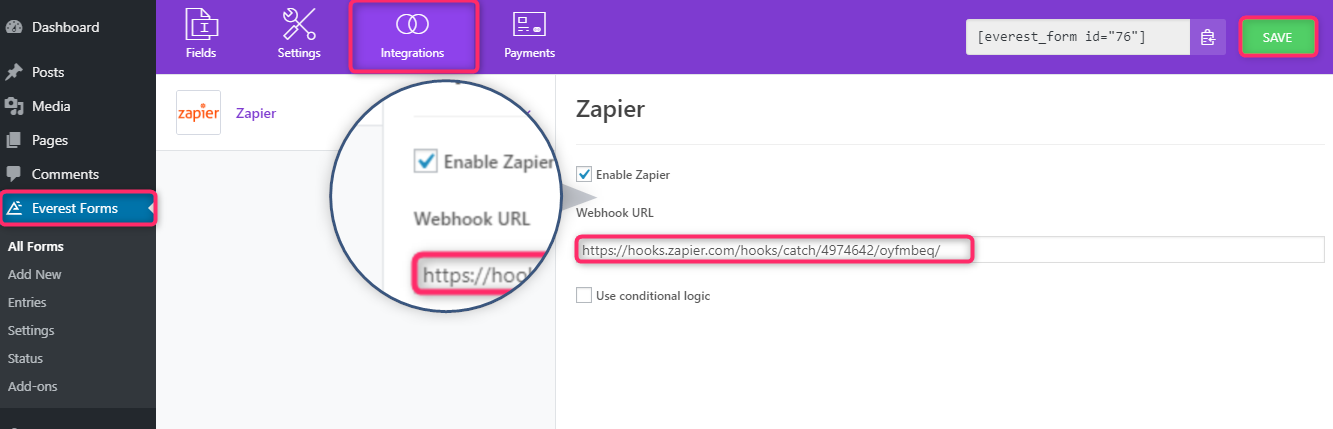
Use Conditional Logic:
Check the Use Conditional Logic option to enable Conditional Logic and send the form data to your zap if only users fill certain fields. For example, the form data will be sent to your zap if the value of the field “Send to Zapier” is “Yes” while submitting the form.
Similarly, you can add more than one conditions according to your requirements.
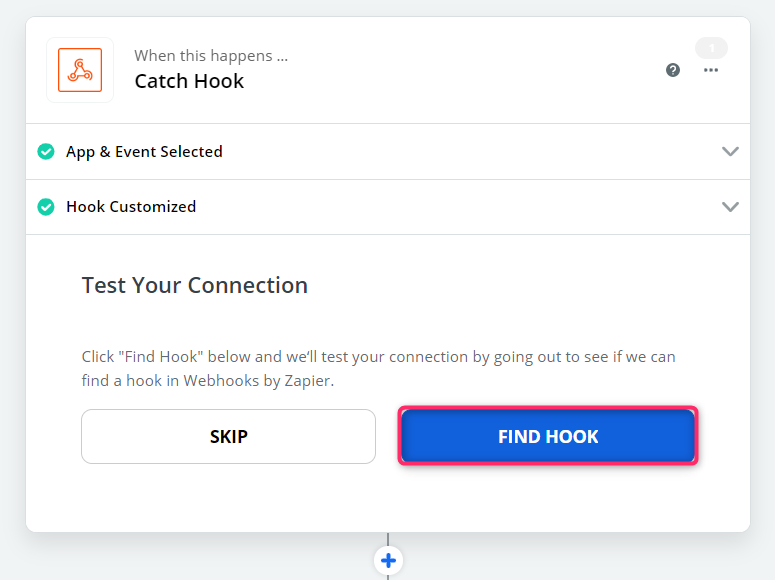
Step 6: Test your Connection #
Lastly, you need to test your Hook. For this, submit a sample form entry of your WordPress form.
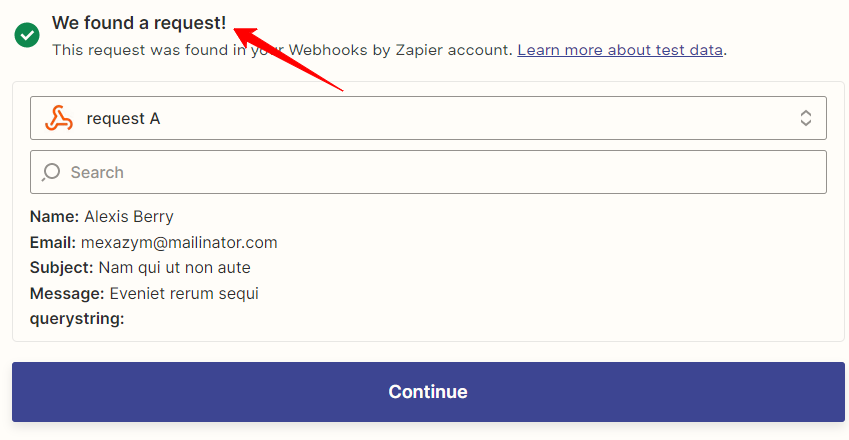
Then, go back to Zapier and click continue. Now, in the Test Your Connection section, click on Find Hook.
If the test is successful, the first step is completed.
Connecting Web Applications with Everest Forms #
The Everest Forms Zapier Add-on allows you to connect various web applications with your WordPress forms effortlessly. You can check the following articles for detailed instructions:


